Family Photography
How to Take Beach Pictures
Practical guide to South Shore beach photography — golden hour timing, midday workarounds, and composition for Duxbury, Scituate, and Nantasket.
Chris McCarthy
Professional Photographer, Photography Shark · November 26, 2024 · Updated November 10, 2025
The beaches of the South Shore of Massachusetts are among the most photogenic coastlines in New England — and I'm not just saying that because I've photographed hundreds of sessions on them. From the wild, dune-backed barrier beach at Duxbury to the rocky ledges at Scituate's Third Cliff, from Nantasket's broad boardwalk stretch at Hull to the quieter shores of Humarock, each location has a distinct visual character that rewards photographers who know how to work with it.
Whether you're shooting professionally or just trying to get better photos from your beach outings, understanding how to work with coastal light, environment, and subjects transforms what you come home with. Here's a comprehensive guide to taking beach pictures that are actually worth keeping.
The Most Important Variable: Light
All photography is light. At the beach, this is amplified because you're working with a very bright, very reflective environment that a camera's sensor handles differently from how your eye does.
Golden Hour: When Beach Photography Is at Its Best
The hour after sunrise and the two hours before sunset produce what photographers call golden hour light — warm, directional, low-angle light that wraps around subjects with dimension and softness. On the South Shore in summer, golden hour runs roughly from 6:30 to 8:00 PM for evening sessions and 5:30 to 7:00 AM for morning sessions.
This light is extraordinary at the beach for several reasons:
- Direction. Low-angle light creates shadows that reveal texture in sand, water, and subjects' faces. It adds dimension that midday overhead light completely flattens.
- Color. The warm amber and golden tones of sunrise and sunset are flattering on every skin tone and transform the color palette of the ocean and sky into something genuinely spectacular.
- Intensity. Soft enough that subjects can face the light without squinting, but directional enough to provide modeling and shape.
- Beauty of sky. The sky in the 30 minutes before and after sunset can produce the kind of dramatic colors — deep orange, layered pink and purple, vivid crimson — that are the defining visual elements of iconic beach photography.
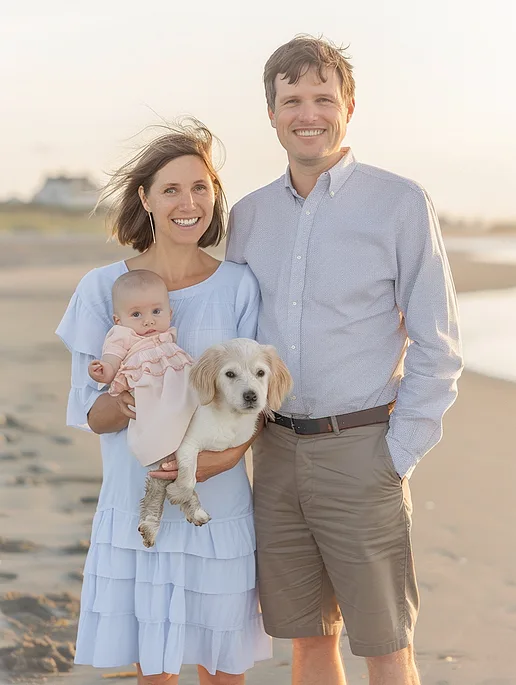
For family photos sessions on the South Shore, I schedule beach sessions to begin 90 minutes before sunset. At Duxbury Beach or Scituate's Humarock Beach in July, that's around 6:30 PM. The session runs through the peak golden hour and into the blue hour that follows.
Dealing With Midday Sun
Sometimes you don't have flexibility about when you shoot. A birthday party on the beach, a family gathering that starts at noon — you work with what you have.
At midday, the primary challenge is the sun directly overhead, which creates "raccoon eyes" — deep, dark shadows in the eye sockets that make subjects look exhausted or ill. The solutions:
- Open shade. Position subjects under a beach umbrella, a covered pavilion, or the shadow of a dune or vegetation. Shade from the side — not from above — gives you much more flattering light.
- Turn subjects toward a reflecting surface. Sand is actually a very effective reflector. Kneeling down and shooting slightly upward (a low camera position) lets the bright sand fill in shadows from below.
- Backlight. Position subjects with the sun behind them. This eliminates harsh eye shadows and creates a beautiful rim-light halo around hair and shoulders. Use a spot meter, fill flash, or exposure compensation to bring the subject's face up to proper exposure while the background blows out or remains bright.
- Overcast days. An overcast sky is essentially a giant diffusion box — it produces soft, even, very flattering light with no harsh shadows. Colors are more muted on overcast days, but skin tones are beautiful and the light is forgiving.
Camera Settings for Beach Photography
Exposure Considerations
The beach environment is bright and the camera will often underexpose to compensate for all that reflected light. If you're shooting in automatic modes, the camera's metering system will often try to "average" the bright sky and sand, resulting in your subjects being underexposed.
- Dial in +1 to +1.5 stops of exposure compensation when shooting in bright beach conditions with automatic or semi-automatic modes. This compensates for the metering error and correctly exposes your subjects.
- Watch your highlights. Bright sky and water can easily blow out (lose all detail in the brightest areas). If you're shooting RAW files, recovery latitude in post-processing is substantial. If you're shooting JPEG, what's blown out in the capture is gone permanently.
Shutter Speed and Movement
The beach offers a lot of moving elements: waves, wind-blown hair and fabric, running children, birds in flight. Your shutter speed choice determines how these are rendered.
- Freeze motion: 1/500 second or faster to freeze crashing waves or running children with crisp edges.
- Blur motion: 1/30 second or slower to render moving water as smooth and silky. Requires a tripod and patience, but the results — particularly for long-exposure seascape work — are dramatic.
- Subject movement in portraits: At minimum 1/250 second for subjects who might move slightly between frames; 1/500 for children in motion.
ISO and Noise
In bright beach conditions, you generally won't need to push ISO significantly. ISO 100–400 covers most situations at the beach during daylight. In blue hour or after sunset, ISO climbs — a modern full-frame sensor handles ISO 1600–3200 well enough for portrait work.
Aperture and Depth of Field
Portrait work at the beach benefits from a wider aperture (f/1.8 to f/4) that separates subjects from the background and produces that background blur that keeps attention on faces rather than on whatever's happening on the beach behind your subject. Landscape and environmental beach photography often benefits from a narrower aperture (f/8 to f/16) that keeps the full sweep of sand, water, and sky in sharp focus.
Composition at the Beach
Rule of Thirds and the Horizon Line
Place your horizon at the upper or lower third of the frame rather than bisecting the image. A horizon in the center of the frame typically produces a static, uninteresting composition. When the sky is dramatic — colorful at golden hour, stormy and textured — give it more frame real estate by placing the horizon in the lower third. When the foreground elements (sand, wave patterns, people) are the story, put the horizon in the upper third.
Leading Lines
Beaches offer excellent leading lines: the shoreline itself, the water's edge at low tide, the ruts left by beach vehicles, a string of beach chairs receding into the distance. Use these lines to guide the viewer's eye through the frame and toward your subject.
Foreground Interest
Don't neglect the foreground. Sand at low tide develops intricate patterns — wave ripples, sand dollars, crab tracks, tide pool margins. Getting low (physically kneeling or lying on the sand) and including these foreground details creates depth and specificity that overhead compositions lack.
At Duxbury Beach, the wild beach grass at the top of the dunes creates natural foreground framing. At Nantasket, the old seawall provides geometric foreground texture. At Scituate's Fourth Cliff, the exposed rock shelf creates layered foreground interest that adds depth to seascape compositions.
Frame Within the Frame
Natural elements can frame your subjects within the image and create a sense of place. Beach grasses arching overhead, the silhouette of a rock outcropping, the curve of a breaking wave — these elements create a secondary frame that anchors your subject in the environment.
Working With People at the Beach
If beach photography involves portraits — people, families, couples — the environmental and technical challenges compound with the interpersonal ones.
Directing for Natural Results
The most common failure in beach portrait work is stiffness — subjects who know they're being photographed and lock into an unnatural stillness. The beach actually offers an advantage here because there's always something to interact with: waves to walk toward, sand to sit in, wind to react to.
Build movement into your direction. "Walk toward me slowly along the waterline" produces more natural-looking images than "stand here and smile." "Look out at the water and tell me what you see" generates a real expression rather than a performed one.
For family photos sessions on the beach, I use activity-based direction with kids — finding shells, building a small sand mound, chasing (or being chased by) the waves' edge. When kids are doing something they're genuinely interested in, they forget about the camera entirely, and those are always the best frames.
Sand, Water, and Clothing
Brief your subjects on practical considerations before the session:
- Bare feet photograph beautifully on the beach and make walking in sand comfortable
- Light, flowing fabrics move in the wind and add dynamism to beach portraits; stiff, heavy fabrics don't
- Light colors and whites can overexpose against bright sand; earth tones, soft blues, and warm neutrals tend to work better
- Hair that's down and natural responds to the wind in ways that look organic in photos; heavily styled updos that blow apart look like disarray rather than movement
The Tide Variable
Tidal state significantly changes the character of any South Shore beach. Low tide reveals broad, flat sandy flats perfect for walking-on-the-beach shots, exposes sand bar features, and moves the wave line far enough from the dunes to work in multiple zones. High tide against a seawall or cliff produces dramatic wave action and a more intimate, compressed shoreline.
Check the tide chart before any beach session. I use the NOAA tide predictions for Boston Harbor as the reference for South Shore beaches, adjusting slightly for local differences. Shooting two hours before or after dead low tide gives you the broadest, most versatile beach environment.
Protecting Your Gear at the Beach
Sand and salt water are destructive to camera equipment. Take these precautions seriously:
Never change lenses on the beach. Even a brief lens change in a sandy environment can introduce particles to your sensor. Change lenses before you arrive or in a sheltered spot with minimal air movement.
Keep a UV filter on your lenses. Not for the filtration effect — for physical protection from salt spray. A UV filter costs $30–80; a lens element is far more.
Carry a microfiber cloth. Salt spray leaves deposits on front glass even when you don't realize it's happening. Wipe the front element between setups.
Use a camera bag, not just a strap. Cameras hanging on straps swing and are vulnerable to accidental dips and knocks in surf zone work. Keep the camera in a bag when not actively shooting.
After the session: Wipe down camera bodies and lenses with a slightly damp cloth to remove salt residue, then dry thoroughly. Do not use lens cleaner directly on the body — it can damage rubber seals.
Post-Processing Beach Photos
Adjusting for the Beach Color Environment
Beach photos often have color balance issues that need correction in post: the bright sky pulls the white balance cool, sand can introduce warm color casts, water in shade can go heavily blue-green. Warm the white balance if the image looks too cool, and bring down the blue saturation slightly if the sky and water are competing with your subjects.
Skin Tones in Bright Environments
Skin tones at the beach are often challenged by environmental light mixing — warm direct sun on one side, cool blue sky filling the other. In post-processing, use the HSL (Hue/Saturation/Luminance) panel in Lightroom or equivalent to tune orange and yellow channels (which cover most skin tones) independently of the overall color balance.
Recovering Highlights
Blown-out sky and water highlights are recoverable in RAW files down to about 1.5 to 2 stops. Bring the Highlights slider down first, then use the White slider if you need more recovery. The Graduated Filter or Radial Filter can target the sky independently of the foreground if the exposure balance between sky and land is particularly challenging.
Beach Locations on the South Shore Worth Knowing
If you're shooting portraits on the South Shore, these are the beaches and coastal areas worth building into your location knowledge:
Duxbury Beach: Long, wild barrier beach with open dunes and beach grass. Very few people past the main parking area. Spectacular at golden hour when the dunes catch warm light.
Humarock Beach, Scituate: Narrow barrier beach between the South River and the ocean. Photogenic water-on-both-sides perspective available at some points along the beach.
Nantasket Beach, Hull: Classic New England boardwalk beach with broad sand. The old seawall along Nantasket Ave provides architectural background options. Accessible from multiple parking areas.
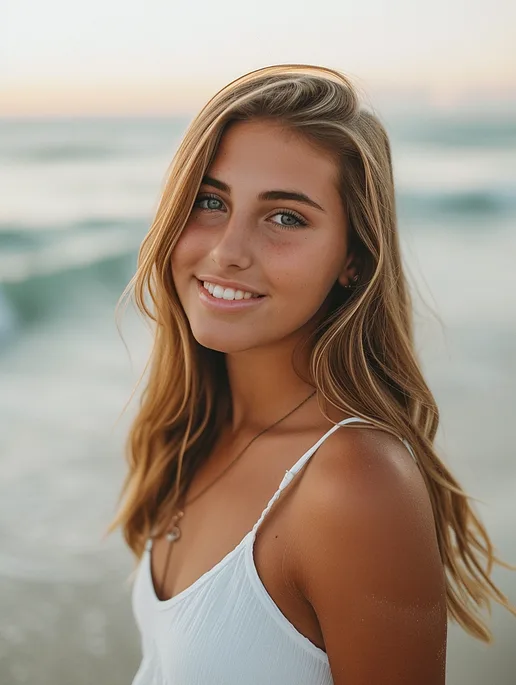
Fourth Cliff, Scituate: Elevated rocky headland with ocean views on three sides. More dramatic and rugged than flat beach environments; excellent for seniors and editorial-style portraits.
Cohasset Harbor: Not technically a beach but extraordinarily photogenic — granite boulders, historic lighthouse at Minot's Ledge visible, lobster boats, classic New England fishing village character.
World's End, Hingham: Formal landscapes, managed meadows, and harbor views. Requires a small entrance fee; allows commercial photography with advance notice to the Trustees of Reservations.
Ready to Book Your Session?
Photography Shark Studios has photographed beach portraits across the South Shore for over a decade. If you want professional beach photography — for family photos, senior portraits, couples sessions, or personal branding — we know the locations, the light, and the techniques that produce images worth framing.
Contact us to book your beach photography session and let's choose the right location and timing to make the most of the South Shore coast.
Frequently Asked Questions
Which South Shore beaches does Photography Shark use for portrait sessions?
Chris McCarthy shoots regularly at Duxbury Beach, Nantasket Beach in Hull, Minot Beach and Humarock in Scituate, and Third Cliff. Each has a distinct character suited to different styles of portrait.
What is the best time for a beach portrait session on the South Shore?
Two hours before sunset — golden hour. In July at Duxbury or Humarock that's around 6:30 PM. Sessions are scheduled to run through golden hour and into blue hour.
How much do beach portrait sessions cost at Photography Shark?
Family beach sessions start at $395 for a 30-minute session with 10 edited images. Senior portraits start at $395. Headshots (typically studio-based) start at $395. All sessions are based out of 83 E Water Street, Rockland MA 02370.
Can you shoot beach portraits in overcast or cloudy conditions?
Yes — an overcast sky acts as a giant diffusion box producing soft, even light with no harsh shadows. Skin tones are often beautiful on overcast days. Chris plans sessions around conditions and can advise on rescheduling.
How long will it take to receive my beach portrait gallery?
Edited galleries are delivered within 1–2 weeks of your session date.
Do I need to bring anything special to a beach portrait session?
Bring any outfits you'd like to change into and footwear appropriate for the sand. Chris will advise on colors and styles when you book — earth tones and neutrals tend to work well against coastal backgrounds.
Related Posts

Dating Photography
How to Take Good Dating Profile Pictures: A Photographer's Guide
Photography Tips
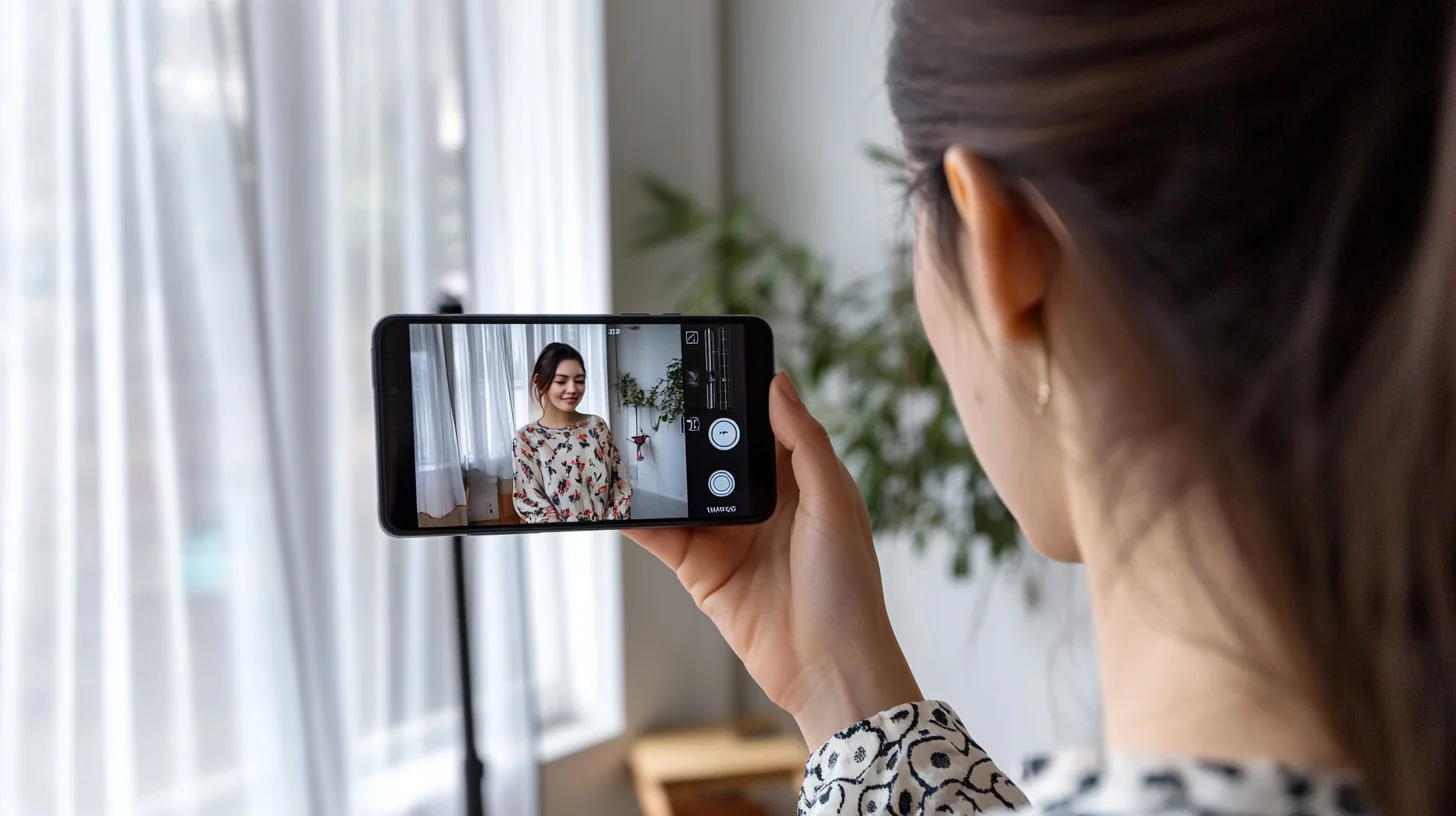
How to Take a Professional Headshot With Your iPhone (9 Steps)

Senior Portraits
Senior Pictures with a Letterman Jacket

Senior Portraits
Senior Pictures Studio - Photography Shark Studios
Photography Tips
Scituate Senior Portraits at the Beach

Headshots
How to Take Amazing Headshots
You Might Also Like
About the Author
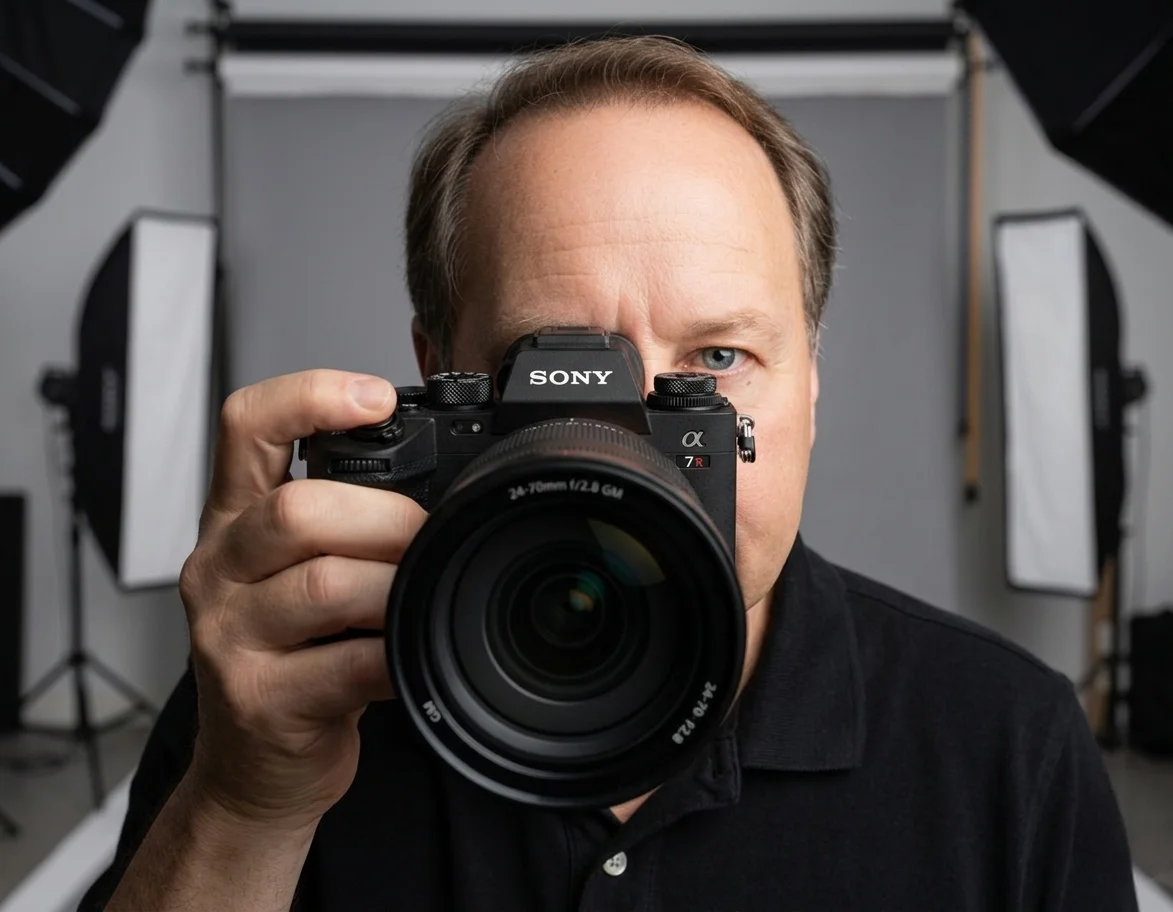
Chris McCarthy
Chris McCarthy has run Photography Shark Studios in Rockland, MA for over 10 years and 500+ sessions, with executive headshot work for Rockland Trust, Clean Harbors, M&T Bank, and McCarthy Planning; founder portraits for AI startups including Lowtouch.ai; product photography for South Shore brands like Lauren's Swim; and headshots across South Shore legal, medical, financial, and academic practices. Every session is personally shot and edited by Chris on Sony mirrorless and Godox strobe systems — no assistants, no outsourcing, no batch retouching. Galleries deliver in 3–5 business days. About photographer Chris McCarthy →
Photography Shark · Boston & South Shore MA
Ready to Book a Session?
Professional headshots, senior portraits, boudoir, and model portfolios. Studio in Rockland, MA — 25 miles south of Boston. Sessions from $395.