
Photography Tips
Mastering Sharp Photography: 10 Essential Tips for Sharp Images
10 sharpness principles from Photography Shark's Sony-based Rockland MA studio — autofocus modes, aperture choices, and technique for headshots and events.
Chris McCarthy
Professional Photographer, Photography Shark · June 24, 2024 · Updated December 25, 2025
Why Sharp Images Are the Foundation of Professional Photography
Sharpness in photography is one of those qualities that viewers notice instantly — not necessarily consciously, but instinctively. A tack-sharp image commands attention in a way that a soft or blurry one doesn't, even if the composition and color are identical. Whether you're shooting portraits, events, or landscapes, sharpness is foundational. Everything else builds on it.
In my experience working with clients across Boston and the South Shore, the biggest gains come from the simplest adjustments.
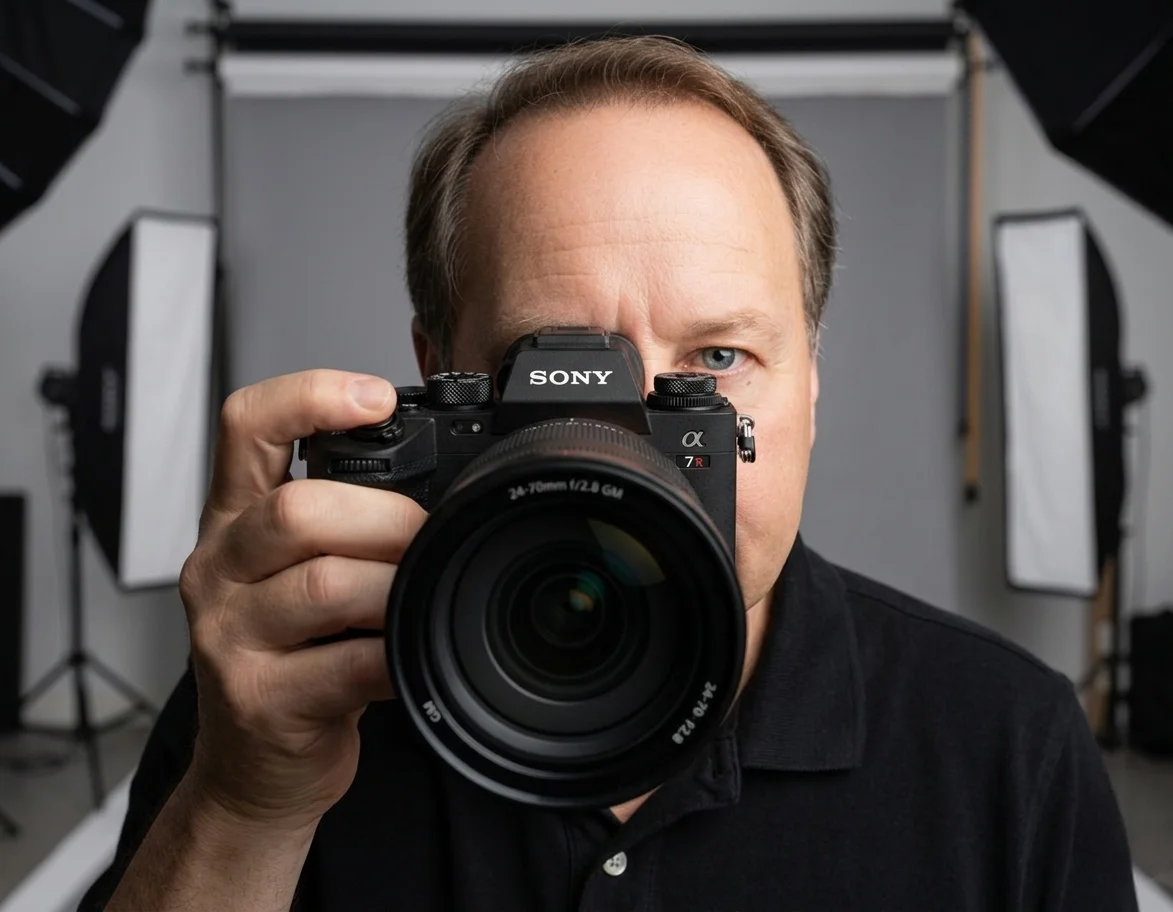
At Photography Shark Studios, Chris McCarthy shoots on Sony — a system specifically chosen for its autofocus performance, image quality, and optical precision, all of which contribute directly to the consistently sharp images that define our headshot sessions, studio portraits, and event photography work. The sharpness in our images doesn't happen by accident. It's the result of specific, repeatable technical choices made consistently across every session.
Here are ten of the most important principles behind sharp photography — applicable whether you're a professional working on technical refinement or an enthusiastic amateur trying to understand why your images aren't as sharp as you want them to be.
1. Understand Your Camera System Thoroughly
Before troubleshooting sharpness issues, understand your specific camera's capabilities and limitations. Different camera systems have different autofocus algorithms, different minimum focusing distances, different native ISO performance, and different sensor characteristics that affect how sharpness is rendered.
On Sony mirrorless bodies — the Alpha series — the autofocus system is among the most sophisticated available, particularly for eye detection and real-time tracking. But that sophistication requires understanding how to configure it. Eye AF needs to be activated. Tracking zones need to be set correctly for the type of subject you're shooting. A camera with excellent autofocus that's been configured incorrectly will underperform a camera with average autofocus that's been dialed in properly.
Regardless of your system, spend time in controlled conditions — not mid-session — testing your camera's autofocus under different conditions. Know how it handles face detection, how it responds to low contrast, and what its limitations are at extreme focal lengths or apertures. This knowledge pays dividends in every session.
2. Choose the Right Autofocus Mode for Your Subject
Most camera systems offer two fundamental autofocus modes for single-shot work: phase detection (fast, used for static and moving subjects) and contrast detection (slower, highly accurate, historically used for static subjects). Modern mirrorless systems combine both.
For portrait work — headshots, studio portraits, environmental portraits — the relevant choice is between AF-S (single-shot autofocus) and AF-C (continuous autofocus).
AF-S acquires focus when you half-press the shutter and locks it. This is appropriate for subjects who are not moving relative to the camera — a person holding still during a studio headshot session, for instance.
AF-C continuously adjusts focus as the subject or camera position changes. This is appropriate for moving subjects — children during a family session, subjects walking toward you, coverage during an event.
Using AF-C for a stationary subject wastes processing resources and can occasionally hunt unnecessarily. Using AF-S for a moving subject produces images that are sharp at the moment you acquired focus but blurry by the time the shutter fires. Match the mode to the subject.
For eye tracking and face detection, which is increasingly reliable in modern mirrorless systems — Sony's in particular — keeping AF-C active with tracking engaged is often the correct configuration for portrait work, even when subjects are relatively stationary. The system handles the distinction automatically.
3. Focus on the Right Point — Usually the Eyes
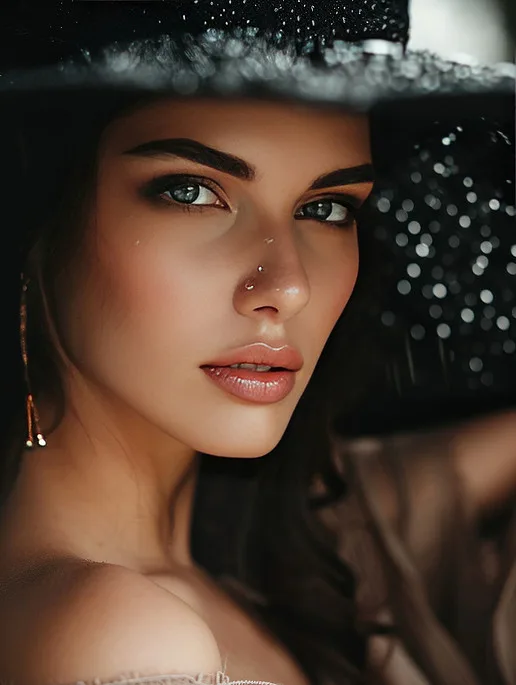
In portraiture, the standard rule is to focus on the nearest eye. The eyes are where viewers look first when evaluating a portrait, and if the eyes are sharp, the image will read as sharp even if other elements — the tip of the nose, the ears, the background — are softer due to depth of field.
If a face is turned at an angle so that one eye is significantly closer to the camera than the other, focus on the closer eye. If you're shooting a profile, focus on the eye that's visible.
The exception is intentional creative choice: certain fashion and creative portrait images deliberately focus elsewhere — on a hand, an accessory, a mouth — with the eyes rendered softly. This should be a deliberate aesthetic decision, not an accident.
For Sony users, Real-Time Eye AF handles this automatically in most portrait situations, detecting and tracking the nearest eye reliably even across distance and varying light conditions. When it works — which is the majority of the time — it's extraordinary. Know its failure conditions (backlit subjects, extreme angles, faces partially obscured) so you're not caught off guard.
4. Control Your Depth of Field Intentionally
Depth of field — the range of the image that renders as acceptably sharp — is controlled primarily by aperture (f-stop), secondarily by focal length and subject distance. Understanding this relationship is essential for making intentional sharpness decisions.
Wide aperture (low f-number, e.g., f/1.8, f/2.8): Very shallow depth of field. The subject plane is sharp; everything in front of and behind it is progressively blurred. This is the look associated with professional portraiture — sharp eyes, soft backgrounds. Beautiful when executed correctly; a problem when focus lands in the wrong place, because the sharp zone is narrow enough that small focusing errors are immediately visible.
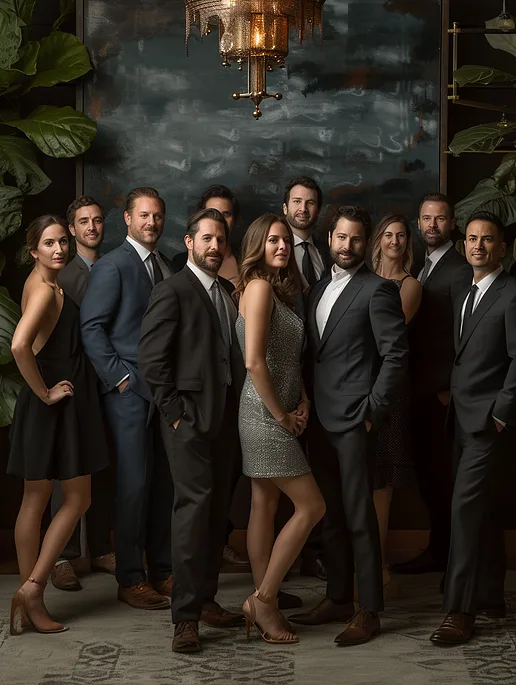
Narrow aperture (high f-number, e.g., f/8, f/11): Deep depth of field. More of the frame is rendered as sharp. Appropriate for group shots, where subjects are at different distances from the camera, and for environmental contexts where the background is part of the story.
For single-subject portraits — particularly headshots — f/2 to f/2.8 is common. For two-person shots where both faces need to be sharp, f/4 to f/5.6 is often safer. For group headshots or team photos, f/8 or f/11 is typically appropriate.
The other depth-of-field consideration: diffraction. At very narrow apertures (f/16, f/22), the physical bending of light around the iris blades introduces softness that counteracts the extended depth of field. There's a practical sharpness peak for most lenses — typically between f/5.6 and f/11 — where optical performance is maximized.
5. Shutter Speed and the Reciprocal Rule
Camera shake — the movement of the camera during exposure — is one of the primary causes of blur in photographs, distinct from subject motion blur. The faster your shutter speed, the less time there is for camera shake to accumulate during the exposure.
The reciprocal rule provides a practical minimum: shutter speed should be at least 1/focal length of your lens. Shooting with a 50mm lens means a minimum of 1/50 of a second. Shooting with a 200mm telephoto means a minimum of 1/200. These are minima for handheld shooting without image stabilization — in practice, faster is better.
For portrait work with studio flash, the shutter speed is largely determined by the flash sync speed of the camera rather than by shake considerations — studio flash exposure is dominated by the brief duration of the flash output rather than the shutter speed. But for available-light portrait work or location shooting, shutter speed is a primary sharpness variable.
For action or children during a family session, shutter speeds of 1/500 or faster are often necessary to eliminate motion blur from unpredictable movement.
6. Image Stabilization: What It Does and What It Doesn't
In-body image stabilization (IBIS) and optical stabilization (OS/OIS) within lenses reduce the effect of camera shake — the movement of the camera itself during exposure. Modern Sony bodies with IBIS combined with stabilized lenses can reliably produce sharp images at shutter speeds several stops slower than the reciprocal rule would suggest.
What image stabilization does not do: stabilize a moving subject. A person walking or a child running will be motion-blurred at the same shutter speeds whether or not IBIS is active. Image stabilization only compensates for camera motion, not subject motion.
This distinction is commonly misunderstood. IBIS enables handheld shooting in lower light than would otherwise be possible, and it's particularly valuable for telephoto or macro work where camera shake is amplified. It is not a substitute for appropriate shutter speed when the subject is moving.
7. Use a Tripod for the Situations That Require It
In studio work with controlled flash lighting, a tripod is rarely necessary — shutter speeds are determined by sync speed and flash duration, not by the requirements of handheld stability. But for certain situations, a solid tripod transforms what's achievable:
- Long exposure photography — any exposure longer than 1-2 seconds requires a tripod for landscapes, architecture, and light painting
- Telephoto work at lower shutter speeds — when you're at the practical limit of handheld shooting and need one more stop of light
- Macro photography — the magnification ratio amplifies camera shake dramatically, and a tripod becomes essential for critical sharpness at close focus distances
- Video work — smooth, stable video requires a tripod or gimbal
A tripod paired with a remote shutter release or the camera's self-timer function eliminates camera shake from mirror slap (relevant for DSLRs) and from the physical act of pressing the shutter button.
8. Calibrate Your Lens-Camera Combination
Autofocus systems can have systematic front-focus or back-focus errors — consistently focusing slightly in front of or behind the intended focal plane. These errors are often small enough to be masked by depth of field at narrower apertures but become visible at wide apertures where the depth of field is shallow.
Most professional-grade camera bodies provide an AF fine-tuning menu that allows you to apply a stored correction value for specific lens-body combinations. Testing for front/back focus using a dedicated focus calibration chart, and applying the necessary correction, is a one-time investment that produces consistently sharper results at wide apertures.
For Sony mirrorless cameras with phase-detection autofocus, these systematic errors are less common than on older DSLR systems with physical AF sensors, but they can still occur. If you're consistently finding that portraits shot wide open have focus landing slightly in front of the eyes when you targeted them, AF fine-tuning or calibration is worth investigating.
9. Optimize Your Processing Workflow for Sharpness
Sharpness in a finished image is partly a capture decision and partly a processing decision. Even technically sharp files benefit from careful processing:
Capture sharpening (also called input sharpening): Applied in post to compensate for the optical low-pass filter and the inherent softness introduced by digital sensors. This is different from creative sharpening and should be applied to every image as a baseline. In Lightroom, the Detail panel provides precise control over capture sharpening with Radius, Detail, and Masking controls.
Selective sharpening: For portraits, sharpening should be applied selectively to the subjects — particularly the eyes — without sharpening the background or the skin overall. Sharpening textured skin can emphasize pores and fine lines in ways that require subsequent skin retouching. The Masking slider in Lightroom's Detail panel, or layer-based masking in Photoshop, allows precise control over where sharpening is applied.
Output sharpening: Images sharpened for screen viewing need different treatment than images sharpened for print. Screen images are viewed at specific pixel densities; print images are viewed at much higher densities, which requires more aggressive sharpening input. Apply output sharpening based on the intended use case.
Noise reduction and its effect on sharpness: Noise reduction algorithms work by averaging adjacent pixels, which reduces grain but also reduces fine detail. The appropriate level of noise reduction is a balance between acceptable noise and acceptable detail loss. For portraits, modest noise reduction that preserves skin texture is often preferable to heavy noise reduction that produces a waxy, detail-free look.
10. Practice Critical Review of Your Own Work
Technical knowledge about sharpness means nothing without the discipline to apply it and the honesty to evaluate your results critically. Build a habit of reviewing images at 100% magnification to assess actual sharpness — not at the zoomed-out view that makes everything look acceptable.
Look specifically at: where focus landed (is it where you intended?), whether there's visible motion blur distinct from focus softness, whether the background blur is smooth (foreground blur can sometimes be confused with focus error), and whether the image holds up at the magnification where it will actually be used.
Reviewing sessions systematically — comparing sharp frames to soft ones and identifying the variable that made the difference — is how technical knowledge becomes practical skill. After a few months of this practice, sharpness decisions become intuitive rather than effortful.
Applying These Principles in a Professional Portrait Context
At Photography Shark Studios, every session is run with these principles actively in mind. The Sony system we shoot on gives us the autofocus performance and optical quality to execute on them reliably. But the principles are the foundation — the equipment expresses them, not the other way around.
Whether you're booking a professional headshot session, senior portrait packages, or family photos, the technical precision behind every image is part of what you're investing in. Sharpness, proper exposure, intentional depth of field — these are not incidental. They're the baseline standard for work that holds up in print, on screens, and at any scale your images might need to appear.
Ready to Book Your Session?
Photography Shark Studios is at 83 E Water Street, Rockland, MA, serving clients from Boston and the entire South Shore — Hingham, Norwell, Scituate, Cohasset, Quincy, Weymouth, Duxbury, Plymouth, Hanover, Marshfield, Kingston, and beyond.
Contact Photography Shark Studios to schedule your session or ask any questions about our services and pricing.
Frequently Asked Questions
What camera system does Photography Shark shoot on?
Chris McCarthy shoots exclusively on Sony mirrorless — chosen for its autofocus performance, eye-detection accuracy, and image quality. The Sony system is central to the consistent sharpness in every headshot and portrait session.
What aperture does Photography Shark use for headshots?
Headshots are typically shot between f/2.8 and f/4 to isolate the subject from the background while keeping eyes and face in sharp focus. The exact setting depends on whether the session is in the studio or on location.
How sharp are the headshots delivered by Photography Shark?
Every delivered image is checked for critical sharpness on the eyes before retouching. Soft focus is not retouched — it's rejected at the selection stage. You will only receive images where the focus is precise.
Does Photography Shark shoot events as well as portraits?
Yes. Event photography is offered alongside headshots, senior portraits, family photos, boudoir, and studio shoots. Event packages are priced separately — contact Photography Shark for event pricing and availability.
Where is the Photography Shark studio located?
The studio is at 83 E Water Street, Rockland MA 02370. It's equipped for headshots, studio portraits, and boudoir photography with controlled studio lighting.
Related Posts
Photography Tips
Before Your First Agency Submission: A New Model's Action Checklist
Photography Tips
Group Event Photography: Expert Tips That Work
Photography Tips
The Model's Bill of Rights: Safety Standards Every Ethical Photographer Should Follow

Photography Tips
Free Model Release Form Template (Plus How to Read One Before You Sign)

Photography Tips
The Model Safety Checklist: 25 Things to Do Before, During & After a Shoot

Photography Tips
Bad Headshots: 12 Things That Make a Headshot Look Unprofessional (and How to Fix Them)
You Might Also Like
About the Author
Chris McCarthy
Chris McCarthy has run Photography Shark Studios in Rockland, MA for over 10 years and 500+ sessions, with executive headshot work for Rockland Trust, Clean Harbors, M&T Bank, and McCarthy Planning; founder portraits for AI startups including Lowtouch.ai; product photography for South Shore brands like Lauren's Swim; and headshots across South Shore legal, medical, financial, and academic practices. Every session is personally shot and edited by Chris on Sony mirrorless and Godox strobe systems — no assistants, no outsourcing, no batch retouching. Galleries deliver in 3–5 business days. About Photography Shark →
Photography Shark · Boston & South Shore MA
Ready to Book a Session?
Professional headshots, senior portraits, boudoir, and model portfolios. Studio in Rockland, MA — 25 miles south of Boston. Sessions from $395.