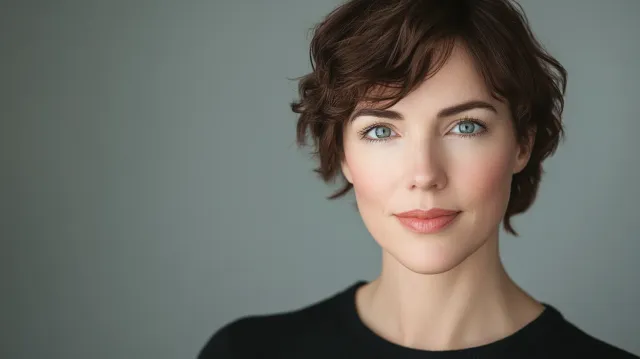
Photography Tips
How to Avoid a Double Chin in Photos: A Photographer's Guide
You see it in photos but not the mirror because of camera height and posture, not your face. Five fixes a headshot photographer uses: camera angle, the jaw-forward turtle, lean, light from above, and wardrobe.
Chris McCarthy
Professional Photographer, Photography Shark · May 28, 2026
The fastest way to avoid a double chin in a photo is to raise the camera slightly above eye level and extend your jaw forward and down — a move photographers call "the turtle." Add a long neck, a subtle lean toward the lens, relaxed shoulders, and light coming from above, and the appearance of a double chin disappears for almost everyone, at any size or age. None of it has to do with how you actually look; it has to do with angle, posture, and light. This guide breaks down why double chins show up in photos and exactly how to make them vanish — in a studio, on your phone, or on a video call.
In more than a decade of studio headshot sessions, this is the single most common worry people bring through the door. It's also one of the most reliably fixable.
Why a Double Chin Appears in Photos (But Not the Mirror)
People are often surprised by under-chin fullness in photos because they don't see it in the mirror. The reason is mechanical, not physical.
Camera height. Most casual photos — especially phone selfies — are taken from below the chin. A camera pointing up exaggerates everything beneath the jaw and compresses the neck. The mirror, by contrast, shows you straight on at eye level.
Lens distortion. Phone cameras use wide-angle lenses that enlarge whatever is closest to them. Hold a phone low and slightly forward, and the area under your jaw becomes the nearest, most distorted part of the frame.
Posture. When you look at a screen or pull your head back to fit the frame, you shorten the distance between chin and chest and bunch the soft tissue under the jaw. A mirror catches you upright and in motion; a photo freezes the worst half-second.
A single frozen angle. In life, people see your face moving through dozens of micro-angles. A photo locks one. If that one happens to be low and head-back, it looks nothing like your lived impression of yourself.
Understanding this is freeing: the "double chin" is usually the circumstances of the photo, and circumstances are controllable.
Fix #1: Raise the Camera
This is the highest-leverage change, so it comes first. Put the camera at eye level or slightly above, angled gently down.
A camera above your eyeline looks down the jawline instead of up at the neck. The jaw becomes the leading edge of the frame and the area beneath it falls into a soft, slimming shadow. Even two or three inches above eye level makes a dramatic difference.
For a phone, this means holding it up and tilting it down toward you — never resting it in your lap or on a desk pointing up. For a webcam, raise the laptop. In a professional session, the photographer sets camera height deliberately for your face, which is part of why studio headshots look so different from selfies.
Fix #2: The Turtle (Jaw Forward and Down)
The signature posing fix feels ridiculous and looks excellent. Photographers call it "the turtle" or "the tortoise":
- Push your forehead and jaw toward the camera — extend your whole head forward, like you're slowly nudging something with your chin.
- Then bring the chin down a small amount — an inch or two.
- Keep your eyes up and engaged with the lens.
Extending the head forward stretches the skin between chin and neck, and the slight downward tilt defines the jawline rather than hiding it. It feels exaggerated from the inside and looks completely natural in the photo.
The two instinctive moves both backfire. Lifting the chin to "stretch" the neck exposes the nostrils and reads as aloof. Tucking the chin straight down without extending forward compresses the area and creates the very shadow you're fighting. Forward then down is the combination that works. It's central enough to posing that it appears in both the headshot poses for women and headshot poses for men guides — this article is the dedicated deep dive.
Fix #3: Lengthen and Lean
Posture does quiet, powerful work here.
- Lengthen the spine and neck. Imagine a string lifting the crown of your head. A long neck has nowhere to bunch.
- Lean in slightly. Bringing your head a few inches toward the camera — leading with the forehead — extends the jaw away from the neck. Leaning back does the opposite and stacks the chin.
- Shoulders down and relaxed. Raised shoulders shorten the neck and crowd the jaw. Drop them before each frame.
Together with the turtle, these turn a slumped, head-back posture into an engaged, jaw-forward one — the difference between a snapshot and a portrait.
Fix #4: Light From Above
Lighting is the fix people forget, and it matters as much as angle.
Light from above, angled down, drops a soft shadow beneath the jaw that defines it and conceals fullness underneath. A window higher than your face, or a studio softbox positioned above and angled down, both do this.
Flat or low light does the opposite. A phone screen lighting your face from below, a desk lamp at chin height, or even bright overhead-but-even office light fills the under-chin area and flattens the definition. On a video call, the laptop screen is often the brightest thing in the room and it's pointing up at you — a double whammy of low camera and low light.
The studio version of this is deliberate: a key light placed above eye level, sometimes with a subtle fill, sculpts the jaw on every frame. The technique behind it is covered in the studio lighting breakdown, but the principle is simple — get the main light up high.
Fix #5: Wardrobe That Helps
Clothing can reinforce a defined jawline or fight it.
- Open or V-necklines draw the eye downward and elongate the neck.
- Avoid high, tight crew necks and turtlenecks in tight head-and-shoulders crops — they visually shorten the neck and push attention up under the chin.
- A collar or lapel that creates a vertical line (an open blazer, a structured collar) frames the jaw and adds length.
- Solid, darker tones under the chin recede; busy or bright fabric there pulls focus.
How to Avoid a Double Chin on Video Calls
The same physics apply to Zoom and Teams, where the default setup is almost designed to create a double chin: laptop low on a desk, camera pointing up, screen lighting you from below.
The fixes:
- Raise the camera to eye level or just above — a stack of books or a laptop stand.
- Sit up and lean slightly toward the screen, leading with the forehead.
- Light from above and in front — a window you face, or a lamp placed higher than the screen, instead of relying on the monitor's glow.
Three small changes, and your everyday meetings stop working against you.
What You Don't Have to Do
A few myths worth retiring:
- You don't need to lose weight to fix it. Double chins in photos affect people of every size; it's overwhelmingly about angle and light. Slim faces look heavy from a low camera, and fuller faces look defined from a high one.
- You don't need heavy retouching. Good posing and lighting do the work in-camera. Professional retouching should refine, not reconstruct — over-smoothing a jawline looks worse than the original.
- You don't need to suck in or strain. The turtle is a gentle extension, not a clench. Tension shows in photos.
It Works for Every Face Shape
None of these techniques depend on your bone structure. Round, oval, square, heart-shaped — the same principles (camera up, jaw forward and down, neck long, light from above) define the jawline on any face. People with naturally angular features still benefit, because a low camera and flat light can flatten even a sharp jaw, while a high camera and overhead light sculpt a fuller one. The fixes are universal because the problem is optical, not anatomical — which is also why two photos taken minutes apart can look like two different people.
When a Professional Just Handles It
If this is the thing you worry about most, the simplest solution is a session where someone else manages all of it for you. In a professional headshot session, the photographer sets the camera height for your specific face, lights the jaw from above, and cues the turtle, the lean, and the shoulder drop in real time — so you never have to think about your chin at all. That real-time direction is most of what you're paying for, and it's why the results look so different from anything self-shot. The pre-session prep guide covers the rest of getting camera-ready.
Quick Reference
- Camera: at or slightly above eye level, angled down.
- Jaw: forward, then slightly down ("the turtle").
- Neck: long; lead with the forehead and lean in.
- Shoulders: down and relaxed.
- Light: from above, angled down — never from below.
- Wardrobe: open neckline; skip tight high necks in close crops.
Ready to Book?
Get in touch to schedule a session. Photography Shark is in Rockland, MA — about 35 minutes south of Boston. Sessions start at $395 with fully retouched images and expression and posing direction included, so the jawline takes care of itself.
Free download: jawline technique in our free headshot guide — what to wear, posing, the squinch and LinkedIn sizes in one PDF.
Related reading: Headshot poses for women · Headshot poses for men · How to prepare for your headshot session · Find a headshot studio near you
Frequently Asked Questions
How do you avoid a double chin in photos?
Raise the camera slightly above eye level, then extend your jaw forward and bring your chin down a touch — the move photographers call "the turtle." Lengthen your neck, lean your head toward the camera rather than sitting back, keep your shoulders down, and use light that comes from above to define the jawline. Done together, these remove the appearance of a double chin for almost everyone, regardless of body type.
Why do I have a double chin in photos but not in the mirror?
The mirror shows you at eye level and in motion, while a photo freezes a single angle — often a phone held low, which points up at your chin and neck. Wide phone lenses also distort whatever is closest to the camera, and pulling your head back to look at the screen compresses the area under the jaw. The "double chin" is usually the camera angle and posture, not a change in how you look.
Does camera angle cause a double chin?
Yes — camera height is the single biggest factor. A camera held below your chin points upward and exaggerates everything under the jaw, while a camera at or slightly above eye level looks down the jawline and naturally conceals it. Raising the camera even a few inches above eye level is the fastest fix for the appearance of a double chin.
How do you pose to hide a double chin?
Push your forehead and jaw toward the camera, then drop your chin slightly — this stretches the skin under the jaw and separates the chin from the neck. Lengthen your spine, lean your head subtly toward the lens, and keep your shoulders relaxed and down. Avoid the two instinctive mistakes: lifting the chin (exposes the nostrils) and tucking it straight down (creates the exact shadow you're trying to hide).
What lighting hides a double chin?
Light from above — a window or a softbox positioned higher than the face, angled down — places a soft shadow beneath the jaw that defines it and hides fullness under the chin. Flat, low, or under-lighting (like a phone screen or a desk lamp) fills that area evenly and makes it more prominent. Soft, directional light from above is the goal.
How do you avoid a double chin on video calls?
Raise your laptop or webcam to eye level or just above (a stack of books works), sit up and lean slightly toward the screen, and put your main light source above and in front of you rather than below. The same three principles as a photo — camera height, posture, and overhead light — eliminate most of the under-chin appearance on Zoom and Teams.
Related Posts




You Might Also Like
About the Author
Chris McCarthy
Chris McCarthy has run Photography Shark Studios in Rockland, MA for over 10 years and 500+ sessions, with executive headshot work for Rockland Trust, Clean Harbors, M&T Bank, and McCarthy Planning; founder portraits for AI startups including Lowtouch.ai; product photography for South Shore brands like Lauren's Swim; and headshots across South Shore legal, medical, financial, and academic practices. Every session is personally shot and edited by Chris on Sony mirrorless and Godox strobe systems — no assistants, no outsourcing, no batch retouching. Galleries deliver in 3–5 business days. About Photography Shark →
Photography Shark · Boston & South Shore MA
Ready to Book a Session?
Professional headshots, senior portraits, boudoir, and model portfolios. Studio in Rockland, MA — 25 miles south of Boston. Sessions from $395.