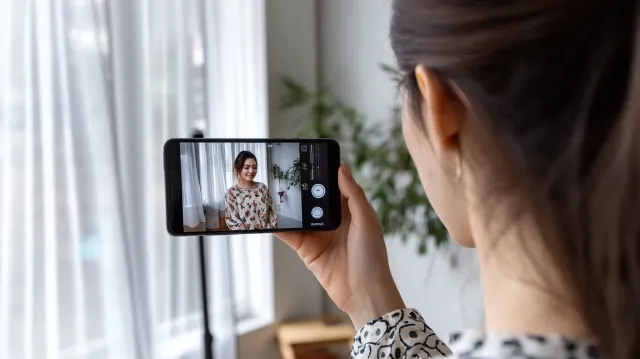
Photography Tips
How to Take a Professional Headshot With Your iPhone (9 Steps)
How to take a good headshot at home with your iPhone in 9 steps — the telephoto-lens trick, window light, Portrait mode, framing, posing, and light editing, using gear you already own.
Chris McCarthy
Professional Photographer, Photography Shark · May 28, 2026 · Updated June 11, 2026
To take a professional-looking headshot with your iPhone: have someone else hold the phone, step back and use the telephoto (2x/3x) lens, face a large window for soft light, put a clean wall a few feet behind you, frame from mid-chest with your eyes a third from the top, lock focus on your eyes, shoot lots of frames, and edit lightly. Two factors do most of the work — camera distance and window light — and getting them right is the difference between a usable LinkedIn photo and an obvious selfie. This is a step-by-step technique guide. It's also a guide to taking a good headshot at home with what you already own — a window, a plain wall, and your phone are genuinely enough; you don't need lights, a backdrop, or a second person if you set things up right (more on the no-studio setup below). (If you're still deciding whether to DIY at all, the honest DIY-versus-professional comparison covers when self-shooting holds up and when it doesn't.)
I shoot headshots professionally, but I'd rather you have a good photo than a bad one — so here's exactly how to get the most out of the camera in your pocket.
What You'll Need
- An iPhone with more than one rear lens (any recent Pro model has a telephoto; standard models have a 2x option).
- Another person to hold the phone. This is non-negotiable — selfies use the front camera and an arm's-length distance that distorts your face. Hand the phone to a friend.
- A large window with indirect daylight.
- A clean wall or simple background.
- Optional: a tripod and the self-timer, plus a white poster board, foam core, or even a bedsheet to bounce light.
That's it. No studio gear required — just light, distance, and a steady hand that isn't yours.
Step 1: Pick the Right Lens (This Is Huge)
The most common reason home headshots look "off" is lens distortion, and it's the easiest thing to fix.
Wide lenses enlarge whatever is closest to them. Up close, that's your nose and forehead — so the 0.5x ultra-wide and even the standard 1x lens stretch your features unflatteringly when you're near the camera. The fix: use the telephoto lens (tap the 2x, 3x, or 5x button depending on your model) and have your photographer step back six to eight feet.
Stepping back and using the longer lens compresses your features the way a professional portrait lens does — it slims the face, normalizes the nose, and flattens the perspective in a flattering way. Do not stand close and crop in afterward; physically back up and zoom with the lens. This single change fixes more amateur headshots than anything else.
Step 2: Set Up Window Light
Light is the other half of the equation. The best free light source in your home is a large window with indirect daylight.
- Face the window, or turn 30 to 45 degrees away from it, so soft light falls across your face.
- Keep the window in front of you, never behind — backlight turns you into a silhouette.
- Avoid direct sun through the glass; it's harsh and creates hard shadows. An overcast day or a north-facing window gives the softest, most even light. If sun is streaming in, diffuse it with a sheer curtain.
- Shoot during the day. Indoor lamps and overhead lights at night produce uneven color and unflattering shadows.
If the side of your face away from the window falls too dark, have your helper hold a white poster board or sheet on the shadow side, angled to bounce light back. This simple "fill" evens out the light and is exactly what a reflector does in the studio.
One important note that ties into a separate common problem: keep the camera at or slightly above your eye level, never below. A low phone pointed up creates shadows and the appearance of a double chin — the full set of fixes is in the guide to avoiding a double chin in photos.
Step 3: Choose a Clean Background
Stand a few feet in front of a clean, uncluttered background — a plain wall, a door, or a simple neutral surface. The distance matters: separation between you and the wall lets the background fall softly out of focus and prevents your shadow from landing on it.
Neutral colors work best — white, gray, soft blue, muted tones. Avoid busy bookshelves, kitchens, and anything with strong lines or clutter behind your head.
Step 4: Use Portrait Mode (Carefully)
Portrait mode simulates the background blur of a professional lens and can make a phone photo look noticeably more polished. Use it, but watch for its failure modes:
- It sometimes mis-cuts the outline — blurring stray hairs, glasses arms, or shoulders incorrectly. Check the edges after each shot.
- Don't crank the blur slider. A little depth looks natural; heavy artificial blur looks fake and gives away the phone.
- If Portrait mode keeps botching your hair or glasses, shoot regular Photo mode against your clean wall instead. A sharp, well-lit normal photo beats a glitchy Portrait one.
Either way, the soft light and telephoto lens are doing the real work; Portrait mode is a finishing touch.
Step 5: Frame It Correctly
Professional headshots follow a consistent framing, and matching it instantly makes your photo read as intentional:
- Crop from roughly mid-chest up.
- Place your eyes about one-third down from the top of the frame.
- Leave a little space above your head — not too much, not cut off.
- Center your face horizontally, or use the rule-of-thirds for a slightly more dynamic feel.
Shoot a touch wider than your final crop so you have room to adjust later. For the exact dimensions and aspect ratios different platforms expect, see the headshot sizes and dimensions reference.
Step 6: Lock Focus and Exposure
Tap your eyes on the screen to set focus there — sharp eyes are the single most important technical detail in a headshot. On iPhone, press and hold to lock focus and exposure (AE/AF Lock) so it doesn't drift between shots. If the image looks too bright or dark, slide the little sun icon up or down to fine-tune exposure before shooting.
Step 7: Pose and Shoot a Lot
Now the part that feels awkward and matters most. A few posing basics that translate directly from the studio:
- Angle your body slightly off-camera, then bring your face back to the lens.
- Lengthen your neck and lean your head subtly toward the phone.
- Push your chin forward and slightly down to define the jaw (it feels strange, it looks right).
- Drop your shoulders and relax them before each frame.
- Soften your eyes and let a genuine expression come and go.
Then shoot dozens of frames. Have your helper keep clicking while you talk, breathe, and let small expressions move across your face. The best frame is almost always an in-between moment, not a held smile. Burst mode helps. Plan to take 50–100 and keep three.
Step 8: Edit Lightly
Restraint is the rule. The goal is a clean, true-to-life image, not a filtered one.
- Crop to your final framing (mid-chest, eyes a third down).
- Adjust brightness and contrast modestly for a clean, even look.
- Correct color/white balance so your skin looks natural — not orange, not blue.
- Use Portrait Lighting sparingly if at all.
- Avoid beauty filters and heavy smoothing — they're the fastest giveaway of an amateur edit. A little is plenty.
Built-in Photos editing or a free app is enough. The comparison of AI headshot tools versus real photography is worth a read before you reach for an AI "enhance" feature — they often overshoot into uncanny territory.
Step 9: Export for the Platform
Save a high-resolution copy and crop platform-appropriate versions: a 1:1 square for LinkedIn and most social profiles, and a 4:5 vertical if you need it for other uses. Upload at the largest recommended size so the image stays sharp when the platform scales it.
Taking a Good Headshot at Home: Setup Without a Studio
The nine steps above assume a helper, but plenty of people need to do this solo, at home, with nothing they'd have to buy. Good news: a clean home headshot is mostly about arranging what you already have. Here's the no-studio version.
Window light is your studio. A single large window during the day is the best free light source there is. Position yourself facing the window (or angled 30–45 degrees off it) so soft, even light wraps your face, and keep the window in front of you so you're never backlit into a silhouette. North-facing windows or overcast days give the softest light; if direct sun is pouring in, hang a sheer curtain or white sheet over the glass to diffuse it. This alone outperforms every ceiling light and lamp in the house — overhead and lamp light cast uneven color and shadows under the eyes.
A plain wall or door is your backdrop. You don't need a real backdrop. A blank section of wall, a door, or any uncluttered neutral surface works. Stand a few feet in front of it — that gap keeps your shadow off the wall and lets the background fall softly out of focus. Neutral tones (white, grey, soft blue) read most professional; avoid bookshelves, kitchens, and busy patterns behind your head.
Prop the phone and shoot hands-free. No helper? Replace them with a tripod or any stable surface — a shelf, a stack of books, a chair with the phone leaned against something — set at or just above eye level. Then use the self-timer (set it to 10 seconds and Burst so you get a run of frames) or a remote/Apple Watch/earbud-volume trigger to fire the shutter. Crucially, this lets you step back six to eight feet and shoot on the telephoto lens, which is the whole game for avoiding distortion. A propped phone on the rear telephoto with a timer beats a held selfie every single time — the selfie-versus-real-headshot comparison shows exactly why that arm's-length front camera distorts your face.
Mind your distance to avoid lens distortion. This is worth repeating because it's the most common home mistake: being close to the camera enlarges your nose and narrows the sides of your face. Back up, zoom with the lens (the 2x/3x button, not a crop), and let the longer focal length flatter your features.
Fix problems with household items. You don't need gear to solve lighting issues. A piece of white poster board, foam core, a white bedsheet, or even an open laptop showing a white screen propped on the shadow side of your face bounces window light back and evens out the shadows — it's a free reflector. A roll of tape marks your spot on the floor so you return to the same focus distance after each timer run. Books or a box raise the phone to eye level.
That's a complete home setup: window, wall, propped phone, a bounce card, and patience. For a fuller honest look at how far a careful home shot gets you versus a studio session, the DIY-versus-pro headshot guide lays out the trade-offs.
Is It Good Enough?
An iPhone headshot done with these steps can absolutely work for LinkedIn and everyday professional use. Be honest about where it tops out, though: phone lenses, uncontrolled light, and app retouching can't fully match a professional session's optical quality, lighting control, multi-format deliverables, and skin work. For actor casting submissions, print, executive bios, or anything image-sensitive, a studio shot is still the right tool — and the DIY-versus-professional breakdown lays out exactly where that line falls.
If you decide the stakes warrant it, you can find a headshot studio near you and skip the trial and error entirely.
Quick Checklist
- Someone else holds the phone (no selfies).
- Telephoto lens, photographer steps back 6–8 feet.
- Window light in front of you; bounce the shadow side.
- Clean wall, a few feet behind you.
- Camera at or above eye level.
- Portrait mode on, blur subtle, edges checked.
- Frame mid-chest, eyes a third down.
- Tap and lock focus on the eyes.
- Shoot 50–100, keep three.
- Edit lightly; export square for LinkedIn.
Want It Done for You?
If you'd rather skip the setup and walk away with a set you're confident in, get in touch. Photography Shark is in Rockland, MA — about 35 minutes south of Boston — with sessions from $395 including professional lighting, real-time direction, retouching, and multiple crops. Curious what a session actually runs in the area first? See the breakdown of headshot pricing around Boston.
Related reading: DIY headshots vs professional · Why a real headshot beats a selfie · Find a headshot studio near you · AI headshots vs professional photography · Headshot sizes and dimensions · How to avoid a double chin in photos
Frequently Asked Questions
How do you take a professional-looking headshot with an iPhone?
Have someone else hold the phone (never a selfie), stand about six to eight feet away and use the 2x or 3x telephoto lens, face a large window for soft light, put a clean wall a few feet behind you, frame from mid-chest with your eyes a third from the top, lock focus and exposure on your eyes, and shoot many frames while a real expression comes and goes. Then edit lightly for crop, brightness, and color. Camera distance and window light are the two biggest factors.
Should you use Portrait mode for an iPhone headshot?
Yes, with care. Portrait mode mimics the soft background blur of a professional lens and works well when you stand a few feet from the background and the lighting is good. Watch the edges — Portrait mode can blur stray hair or glasses incorrectly — and avoid heavy "background blur" sliders that look fake. If Portrait mode mis-cuts your outline, a clean wall shot in regular Photo mode is a safer choice.
Which iPhone lens is best for headshots?
Use the telephoto lens — the 2x, 3x, or 5x option depending on your model — not the 0.5x ultra-wide or even the standard 1x. The wider lenses distort facial features when you're close, enlarging the nose and narrowing the sides of the face. The telephoto compresses features more flatteringly, which is why stepping back and zooming with the lens (not cropping) makes such a difference.
Can an iPhone headshot look professional?
It can look good enough for LinkedIn and casual professional use if the lighting is soft (window light), the lens is the telephoto, the background is clean, and someone else takes it. What an iPhone can't reliably match is the lens quality, controlled lighting, multi-format deliverables, and retouching of a professional session — so for actor casting, print, or anything high-stakes, a studio shot is still the right call.
How do you light an iPhone headshot at home?
Use a large window as your main light: face it (or turn 30-45 degrees from it) so soft, even light falls on your face, and shoot during daytime, avoiding direct sun. Keep the window in front of you, never behind, or you'll be silhouetted. If one side of your face is too shadowed, place a white poster board or sheet on the dark side to bounce light back. Avoid overhead and under-lighting.
Can a headshot be a selfie?
It's better not to. A true selfie uses the front-facing camera at arm's length, and that short distance plus the wider front lens distorts your face — enlarging the nose and narrowing the sides. The fix is the same technique a phone headshot uses: hand the phone to someone else (or use a tripod and timer), step back six to eight feet, and shoot on the rear telephoto lens. If you absolutely must do it alone, a tripod with the self-timer on the rear camera beats a held selfie every time.
Is an iPhone headshot good enough for LinkedIn?
Often yes, if it's done well — good window light, telephoto lens, clean background, correct framing, and taken by another person rather than as a selfie. Many strong LinkedIn photos are shot this way. The gap shows at larger sizes and in side-by-side comparison with professional work, so if your role is senior, client-facing, or image-sensitive, a professional headshot is worth it.
How do I take a good headshot at home?
You don't need a studio — just a large window, a plain wall, and a phone you can prop up. Face the window for soft, even light; stand a few feet in front of a clean wall or door for your background; prop the phone on a tripod (or a stack of books) at eye level and use the self-timer or a remote so you can step back six to eight feet and shoot on the telephoto lens to avoid distortion. A piece of white poster board or a bedsheet on the shadow side bounces light back. Shoot many frames, then crop and edit lightly.
Related Posts


You Might Also Like
About the Author
Chris McCarthy
Chris McCarthy has run Photography Shark Studios in Rockland, MA for over 10 years and 500+ sessions, with executive headshot work for Rockland Trust, Clean Harbors, M&T Bank, and McCarthy Planning; founder portraits for AI startups including Lowtouch.ai; product photography for South Shore brands like Lauren's Swim; and headshots across South Shore legal, medical, financial, and academic practices. Every session is personally shot and edited by Chris on Sony mirrorless and Godox strobe systems — no assistants, no outsourcing, no batch retouching. Galleries deliver in 3–5 business days. More about the photographer →
Photography Shark · Boston & South Shore MA
Ready to Book a Session?
Professional headshots, senior portraits, boudoir, and model portfolios. Studio in Rockland, MA — 25 miles south of Boston. Sessions from $395.