Photography Tips
Clam Shell Lighting Explained: Setup and Ratios
What clam shell lighting is, why it works for headshots and beauty portraits, and exactly how to set it up — from light ratios to camera position.
Chris McCarthy
Professional Photographer, Photography Shark · March 27, 2024 · Updated May 28, 2026
Quick Reference
Clam shell lighting is a two-source setup — a softbox above the subject angled down, a fill source (second softbox or reflector) below angled up — that produces soft, wraparound front illumination. Default light ratio for headshots: 2.5:1 (key brighter than fill). The setup produces minimal facial shadows, defined jawline, and characteristic dual catchlights in the eyes.
Common variations:
- Soft-fill clam shell — both sources are softboxes. Most flattering for all skin types.
- White-card clam shell — second source is a reflector instead of a strobe. ~$20 entry cost.
- Rim-enhanced clam shell — adds a third light behind for separation.
- Beauty-dish clam shell — replaces top softbox with a beauty dish for slightly more contrast.
When to use it: professional headshots, LinkedIn portraits, commercial beauty work, boudoir, model agency submissions. When NOT to use it: dramatic editorial work (use Rembrandt or split lighting instead), environmental portraits, anything requiring strong directional shadow.
Full technical breakdown below.
In my experience working with clients across Boston and the South Shore, the biggest gains come from the simplest adjustments.
Walk into any professional portrait studio and ask the photographer what lighting setup they default to for beauty and headshot work, and there's a good chance they'll describe something very close to clam shell lighting. It's not a trendy technique or a gimmick — it has been a staple of commercial portrait photography for decades precisely because it delivers consistent, flattering results across a wide range of subjects. Understanding why it works, and how to execute it well, is one of the most practical investments a portrait photographer can make.
At Photography Shark, clam shell lighting is one of the foundational setups in the Rockland studio. Photographer Chris McCarthy uses it for professional headshots, for certain boudoir work, and for commercial portrait sessions where the goal is producing clean, well-lit images reliably and efficiently. This post breaks down exactly what clam shell lighting is, the physics behind it, how to set it up, and how to dial it in for different subjects and goals.
Clam Shell Photography: The Short Version
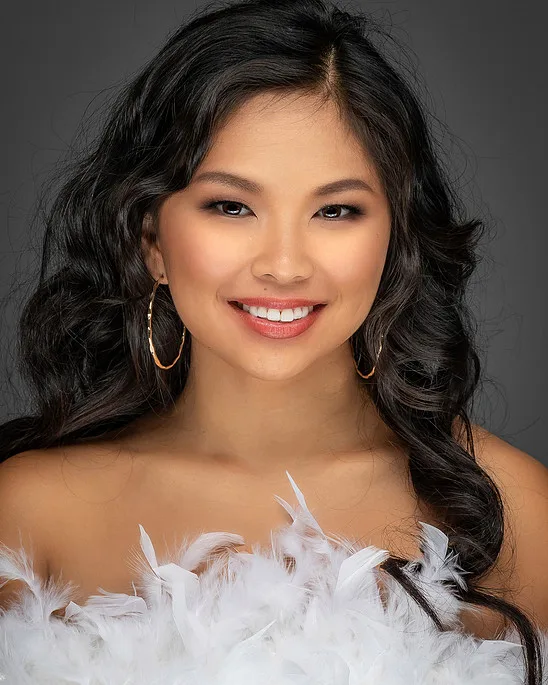
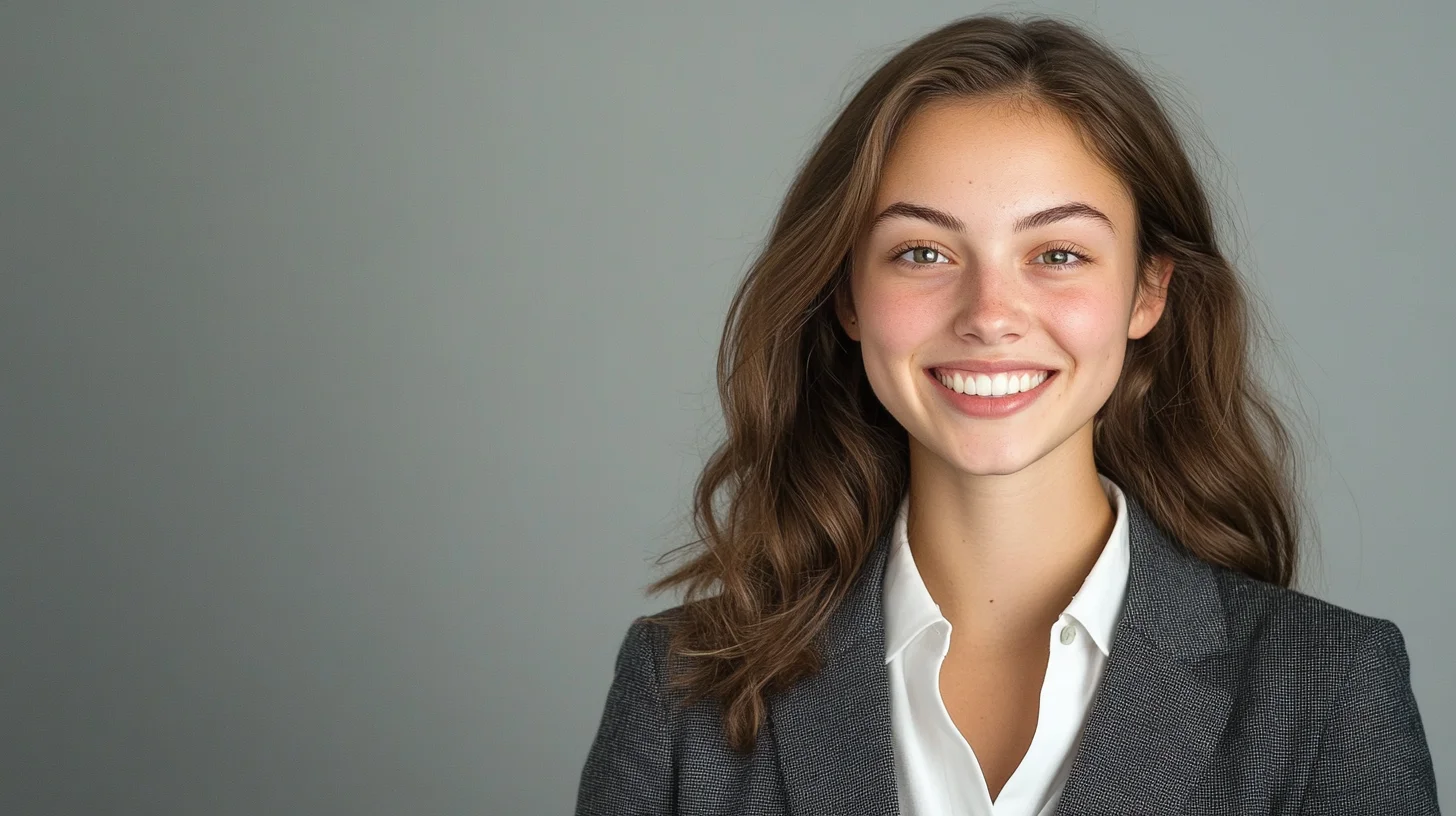
Clam shell photography is the practical application of the clam-shell lighting pattern — a soft front-light (key) positioned slightly above eye level paired with a soft fill source (or reflector) below the subject's face. The two light sources sandwich the face like an open clam shell, creating wraparound illumination that flattens shadows under the eyes, defines the jawline cleanly, and produces the small symmetrical catchlights that make portraits look polished. It is the default setup for fashion editorial, beauty photography, commercial headshots, and most professional model portfolio work. Variations include soft-fill clam shell (most flattering for all skin types), white-card clam shell (cheapest version, uses a $20 reflector instead of a second light), and rim-enhanced clam shell (adds a third light for dimension). The setup costs are low; the technique is reproducible across sessions, which is why it has become an industry standard rather than a stylistic choice. See professional headshots Boston for sessions that use this exact setup.
What Is Clam Shell Lighting?
Clam shell lighting is a two-light portrait setup in which one light source is positioned above the subject — angled down toward the face — and a second light source (or reflector) is positioned below the subject, angled upward. When you look at the arrangement from the side, the two lights form a shape that resembles an open clamshell, with the subject positioned in the center where the "hinge" would be.
The result is soft, even, front-facing illumination that wraps around the face, minimizes unflattering shadows, and produces a gentle catchlight in the eyes. It's particularly effective for beauty and portrait work because it emphasizes skin texture without harshening it, defines cheekbones and jawlines without creating the kind of dramatic shadow fall-off you get from more directional setups, and produces a symmetrical, polished look that reads as professional and contemporary.
Why It Works: The Physics of Diffused Front Light
To understand clam shell lighting, you need to understand what hard and soft light actually mean in practice.
A hard light source is small and focused relative to the subject — a bare strobe head, a direct flash, an undiffused LED panel. Hard light creates sharp shadow edges, high contrast, and pronounced texture. It can look powerful and dramatic, but it's merciless on skin imperfections and tends to flatten facial dimensionality in ways that aren't always flattering.
A soft light source is large relative to the subject — a large softbox, an umbrella, a bounce from a white wall. The light wraps around the subject from multiple angles rather than striking from a single direction, which produces gradual shadow transitions and a more forgiving quality. The larger the light source relative to the subject, the softer the light.
Clam shell lighting takes softness a step further by placing soft sources both above and below the subject. The upper light models the face — it's the primary source, creating the basic shape and dimension of the portrait. The lower light fills in the shadows that the upper light creates, particularly the shadow under the chin, in the eye sockets, and along the sides of the nose. The combination produces illumination that is dimensional enough to show facial structure without the kind of deep shadow fall-off that creates a fatigued or harsh look.
Setting Up a Classic Clam Shell
The Top Shell: Primary Light
The primary light in a clam shell setup is positioned above the camera and angled downward toward the subject's face, typically at 30 to 45 degrees above the horizontal. The light should be large — a 36-inch or larger softbox is ideal, though an umbrella with a diffusion panel works well too. The goal is to create a large, soft primary source that illuminates the top of the face, adds catchlights to the eyes, and casts a subtle shadow under the chin and nose.
The height of the primary light matters. Too high and you get "butterfly lighting" — a small shadow directly beneath the nose — which can be intentional and beautiful but isn't the same thing as a true clam shell. Too low and the light loses its modeling quality and starts to feel flat. A good starting point is to position the top of the softbox even with the top of the subject's head and angle it downward until the light's center is aimed at the bridge of the nose.
Power output for the primary light will depend on your ambient conditions, your aperture, and your strobe or LED power settings. For studio work, a starting point of f/8 at ISO 100 with a medium-power monolight is typical, though every studio setup will vary.
The Bottom Shell: Fill Source
The second element in a clam shell setup is positioned below the subject — often at about chest height, angled upward toward the face. This can be a second strobe with a softbox, a reflector panel, or even a large piece of white foam core.
Using a reflector instead of a powered light source gives you a naturally limited fill ratio — the reflector can only bounce back a portion of the primary light, so it will always be softer than the primary. This produces a natural-looking fill that lifts shadows without competing with the primary for dominance. The ratio between your primary and fill determines the contrast of the final image.
A 2:1 ratio (primary at twice the intensity of the fill) produces a very even, high-key look often associated with beauty and commercial headshot photography. A 3:1 or 4:1 ratio retains more shadow depth and looks slightly more three-dimensional and dramatic. For most headshot clients, we land somewhere around 2.5:1.
Camera Position
In a classic clam shell setup, the camera sits between the two lights — above the fill and below the primary, typically at the subject's eye level or very slightly below. This position means the lens is looking straight into the zone of maximum illumination, which is part of what gives clam shell portraits their characteristic bright, open quality.
Some photographers raise the camera slightly above eye level and tilt it down toward the subject, which creates a mildly more flattering angle for most faces — it slightly elongates the neck and reduces the appearance of a double chin. This is worth experimenting with, especially for clients who are self-conscious about the lower face area.
Clam Shell Variations
Adding a Background Light
A plain clam shell setup with no background light will produce a subject that falls off into shadow or gray behind them, depending on how far back the background sits. For a classic white background look, add a separate strobe aimed at the background and dial it up to roughly match or exceed the main light power. For a darker, more dramatic background, either move the subject further forward (so less main light spills onto the background) or skip the background light entirely.
Rim or Hair Light
For subjects with dark hair against a dark background, adding a low-power rim light from behind and above — essentially a third light positioned at roughly 150 degrees from the camera — adds separation and definition to the silhouette. This is subtle but professionally significant: it's the difference between a portrait where the subject feels embedded in the scene versus one where they feel three-dimensional.
Outdoor Clam Shell
You don't need a studio to use clam shell lighting. The most common outdoor approximation involves placing the subject in open shade (so the sky acts as a large soft top light) and using a large reflector below and in front of the subject to bounce light up into the face. This technique is useful for family photo sessions in shaded environments and for senior portrait work in park settings.
A slightly more elaborate version involves a portable strobe with a collapsible softbox as the key light (positioned above, angled down) with a reflector as the fill below. This gives you control over the key light intensity independent of ambient — useful on overcast days when you want to add a bit of pop without overriding the natural quality of the light.
What Clam Shell Lighting Looks Like on Different Subjects
For Headshots and Business Portraits
For corporate or LinkedIn headshots, clam shell lighting at a moderate ratio (2:1 to 3:1) produces a clean, professional look. We typically use a white or light gray background, a 36-inch softbox overhead, and a large white reflector below. The result is well-lit, consistent, and projects competence — which is exactly what a professional headshot should do.
For Beauty and Fashion
Beauty photographers often push clam shell lighting closer to the subject and closer to a 1:1 ratio, producing extremely even, almost shadow-free illumination that shows off makeup and skin detail without interference. This style requires excellent skin preparation and meticulous retouching, but the final result has the polished quality you see in magazine beauty campaigns.
For studio photo shoots oriented toward fashion or commercial work, we often start with a clam shell base and then modify from there — adding rim lights, adjusting ratios, or bringing in a hair light — to build a more complex and intentional lighting look.
For Boudoir
In boudoir photography, clam shell lighting at a warmer color temperature (around 3200-3500K) with a lower ratio (2:1) produces a soft, intimate quality. The even fill reduces the kind of harsh shadow that would feel unflattering or clinical. Combined with a shallow depth of field on a fast prime lens (the Sony 85mm f/1.4 is exceptional for this), clam shell lighting in boudoir produces images with a genuinely cinematic quality.
Common Clam Shell Mistakes
Positioning the fill too high. If your lower light is too close to the subject's eye level, it starts competing with the primary rather than filling it — the result looks flat and unnatural, like two lights fighting for dominance. Keep the fill low enough that it's visibly subordinate to the primary.
Using a fill that's too powerful. A fill that matches the primary removes all shadow depth from the face, producing a flat, passport-photo quality. Unless you're specifically going for an extreme beauty-flat look, keep the fill at least one stop below the primary.
Forgetting the subject's distance. As you move the subject closer to or further from the lights, the ratio and overall intensity change — this is the inverse square law at work. If a subject steps back three feet during a shoot, you'll need to readjust exposure. For this reason, we mark floor positions in the studio and ask subjects to stay within a defined zone.
Using small softboxes. A 24-inch softbox positioned two feet from the subject is technically "large relative to the subject," but most portrait photographers find that going larger — 36 inches or more — produces notably smoother gradients and softer shadow transitions. Go bigger than you think you need.
Clam Shell Lighting in Practice at Photography Shark
Every headshot client who walks into our Rockland studio gets a clam shell base, and we build from there depending on the look they're after. Clean and corporate? We keep the ratio even, the background light bright, and the session moving efficiently. Actor or performer? We might push to a more dramatic ratio and consider adding a hair light or a gel. Creative professional? We'll experiment.
The advantage of having a reliable base setup is that it frees up mental bandwidth for what actually matters in a portrait session — the direction, the conversation, the moment when the subject relaxes and the genuine expression appears. A photographer who's still troubleshooting their lighting can't be fully present for that moment. Knowing your clam shell cold means your attention is on the person in front of you.
Ready to Book Your Session?
If you're looking for professional headshots, studio portraits, or any other photography service on Boston's South Shore, Photography Shark is ready to help. Our studio is at 83 E Water Street in Rockland, MA.
Reach out on our contact page to schedule a consultation or book a session. We'll make sure the lighting is dialed in before you arrive.
Frequently Asked Questions
What is clamshell lighting?
Clamshell lighting is a two-light portrait setup that places one soft light source above the subject's face, angled down, and a second source or reflector below the face, angled up. Viewed from the side, the two lights form an open clamshell shape with the face at the hinge. The result is soft, even, wraparound illumination that minimizes shadows, defines the jawline, and produces the twin catchlights in the eyes that read as polished and professional. It is the default lighting setup for headshots, beauty work, and commercial portraits.
What is clam shell lighting used for in portrait photography?
Clam shell lighting is a two-light setup — one source above the subject angled down, one below angled up — that produces soft, even, front-facing illumination. It is used primarily for headshots, beauty work, and commercial portraits where a clean, flattering, shadowless look is the goal. Photography Shark uses it as a foundational setup for professional headshots at the Rockland studio.
Does Photography Shark use clam shell lighting for headshots?
Yes. Clam shell is one of the core lighting setups at the 83 E Water Street Rockland studio, used for professional headshots, boudoir, and commercial portraits. It delivers consistent, flattering results across a wide range of clients and is particularly effective for beauty and LinkedIn-style headshot work.
What light ratio is best for professional headshots with clam shell lighting?
For most headshot clients, Photography Shark lands around a 2.5:1 ratio between the primary and fill light. A 2:1 ratio produces a very high-key, even look associated with beauty work. A 3:1 or 4:1 ratio retains more shadow depth for a slightly more three-dimensional result.
Can you add a background or rim light to a clam shell setup?
Yes. A background light aimed at a white paper backdrop creates the classic clean white headshot look. A rim or hair light from behind separates the subject from the background and adds depth. These are standard additions at the Photography Shark studio for clients who need specific corporate or LinkedIn backgrounds.
Is clam shell lighting only for studios, or can it be done outdoors?
It is primarily a studio technique because it requires two controlled light sources. Outdoors, photographers can approximate it using the sky as the top source and a reflector below as the fill — a natural clamshell effect that Chris uses regularly for outdoor headshot and portrait work on the South Shore.
Beauty dish or softbox — which is better for clam shell lighting?
Both work, but they produce slightly different results. A 22-26 inch beauty dish as the key light gives slightly crisper shadow edges, more defined catchlights, and a touch more contrast on skin texture — ideal for editorial-feel headshots. A 36-48 inch octabox or softbox as the key delivers softer, more wrapping light with subtler shadow transitions — ideal for LinkedIn and corporate headshots where the goal is flattering over editorial. The fill below is almost always a reflector or a smaller softbox. Photography Shark uses both depending on the client's intended use of the images.
Does clam shell lighting work for clients with skin concerns or texture?
Yes — clam shell is the preferred setup for clients with skin texture, acne, scarring, or any concern about facial detail. The two-source wrap-around illumination minimizes harsh shadows that would normally exaggerate texture, and the fill light from below fills the under-eye area and softens any drawn look. Combined with conservative retouching, it produces flattering results without erasing the subject's actual appearance, which is the standard at Photography Shark.
How do you set up clamshell lighting?
Place a large softbox — 36 inches or bigger — above the camera and angle it down at the subject's face at roughly 30 to 45 degrees; this is the key light. Position a second softbox or a white reflector below the face at about chest height, angled up, to fill the shadows the key light creates under the eyes, nose, and chin. The camera sits between the two sources at or just above eye level. Set the lower fill about one stop weaker than the key — a 2.5:1 ratio suits most headshots — then adjust the subject's distance to fine-tune contrast. Photography Shark uses this exact setup as the base for studio headshots in Rockland, MA.
What is the difference between clamshell and butterfly lighting?
Butterfly lighting uses a single key light placed high and directly in front of the subject, creating a small butterfly-shaped shadow beneath the nose. Clamshell lighting starts from that same high front key but adds a fill source below the face to lift the shadows butterfly lighting leaves under the eyes, nose, and chin. In short, clamshell is butterfly lighting plus a bottom fill — softer, more forgiving on skin texture, and flattering across a wider range of faces and ages.
What is the 3-point lighting rule?
Three-point lighting is the classic arrangement of a key light (the main source), a fill light (which softens the key's shadows), and a back or rim light (which separates the subject from the background). It is the foundation most portrait and video lighting builds on. Clamshell lighting is a variation that stacks the key and fill vertically — key above, fill below — and you can extend a clamshell setup into full three-point lighting by adding a rim or hair light behind the subject for separation.
What are the four main types of light in photography?
They are generally described as hard light (small, focused sources that create sharp shadows and high contrast), soft light (large, diffused sources that wrap around the subject and flatter), specular light (bright directional highlights off shiny surfaces), and diffused or ambient light (even, low-contrast fill). Clamshell lighting is a soft-light technique: it uses two large, diffused sources to wrap the face, which is why it minimizes texture and reads as flattering on nearly every subject.
Related Posts
Photography Tips
Rembrandt Lighting: A Guide for Portraits
Photography Tips
The Model's Bill of Rights: Safety Standards Every Ethical Photographer Should Follow

Photography Tips
Free Model Release Form Template (Plus How to Read One Before You Sign)

Photography Tips
The Model Safety Checklist: 25 Things to Do Before, During & After a Shoot
Photography Tips
Bad Headshots: 12 Things That Make a Headshot Look Unprofessional (and How to Fix Them)
Photography Tips
The Boston Student's Guide to Job & Internship Headshots
About the Author
Chris McCarthy
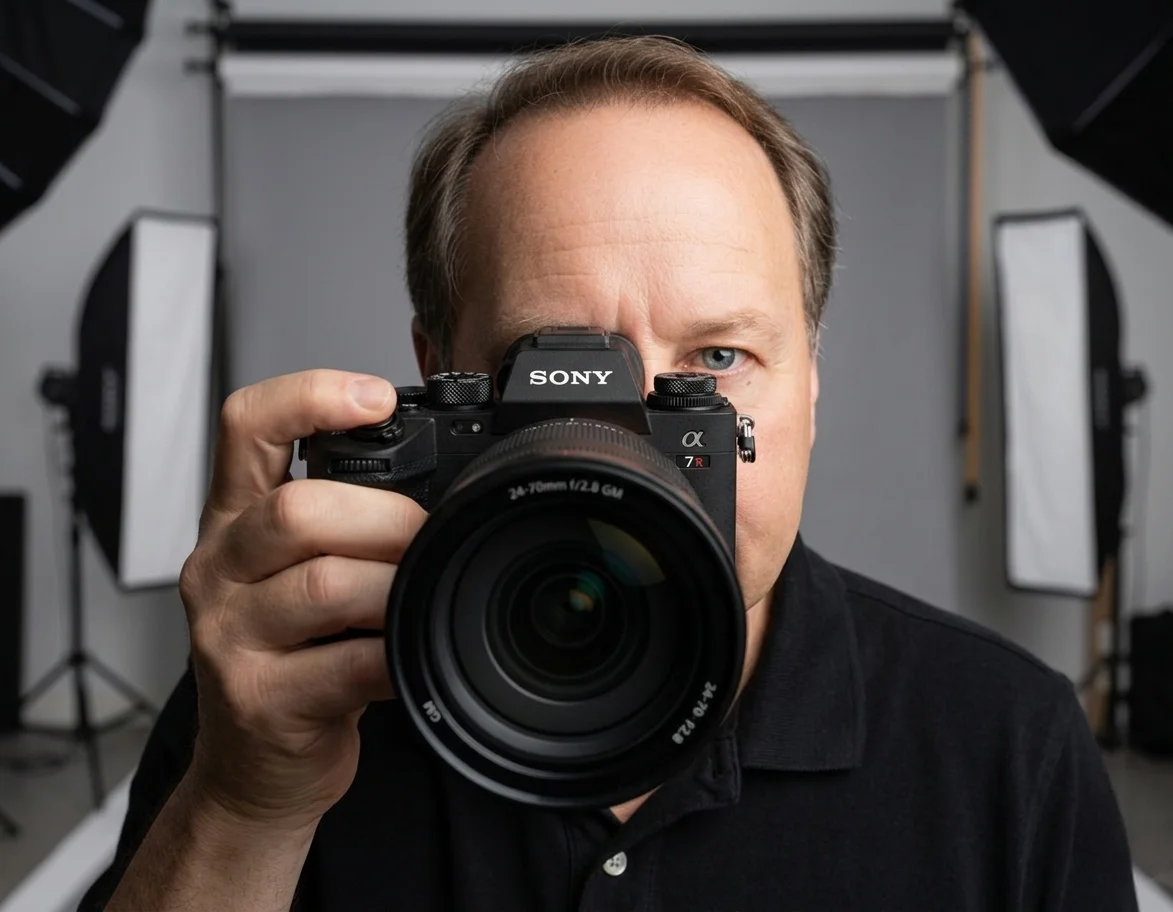
Chris McCarthy has run Photography Shark Studios in Rockland, MA for over 10 years and 500+ sessions, with executive headshot work for Rockland Trust, Clean Harbors, M&T Bank, and McCarthy Planning; founder portraits for AI startups including Lowtouch.ai; product photography for South Shore brands like Lauren's Swim; and headshots across South Shore legal, medical, financial, and academic practices. Every session is personally shot and edited by Chris on Sony mirrorless and Godox strobe systems — no assistants, no outsourcing, no batch retouching. Galleries deliver in 3–5 business days. About the photographer →
Photography Shark · Boston & South Shore MA
Ready to Book a Session?
Professional headshots, senior portraits, boudoir, and model portfolios. Studio in Rockland, MA — 25 miles south of Boston. Sessions from $395.