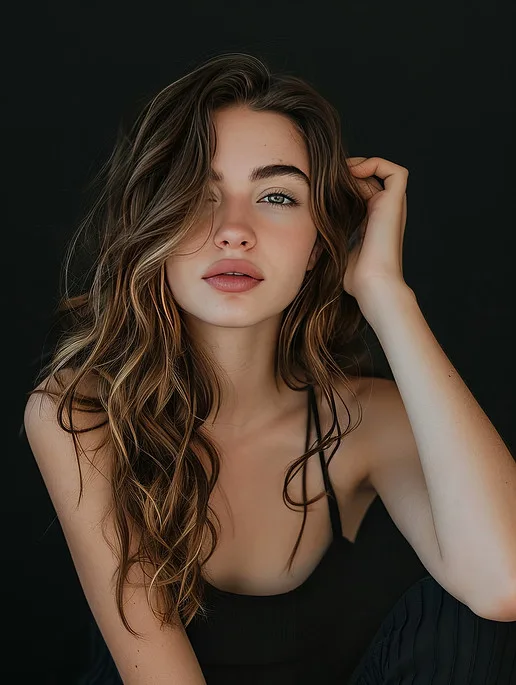
Photography Tips
Mastering Light in Portrait Photography
How portrait photographers use natural and studio light — golden hour, open shade, overcast, backlighting, and strobes — with South Shore examples.
Chris McCarthy
Professional Photographer, Photography Shark · December 27, 2024 · Updated March 16, 2026
Light is not a backdrop to photography — it is the medium itself. Every decision a portrait photographer makes, from the choice of location to the time of day to the placement of equipment, is ultimately a decision about light. Understanding light with enough depth and nuance to use it intentionally, rather than simply react to it, is what separates portraits that feel alive from portraits that technically work but lack presence.
In my experience working with clients across Boston and the South Shore, the biggest gains come from the simplest adjustments.
At Photography Shark in Rockland, MA, photographer Chris McCarthy has spent over ten years working with light in every form — the late-afternoon sun over Nantasket Beach, the directional strobes in the studio, the flat overcast sky that rolls in off the Atlantic in autumn, the warm window light of an indoor consultation space. This guide draws on that working knowledge to explain how portrait photographers understand and control light at a practical level.
Why Light Defines a Portrait's Emotional Character
Before getting into the technical mechanics, it is worth dwelling on why light matters so much emotionally. Two portraits of the same person in the same location can communicate entirely different emotional registers depending solely on the quality, direction, and color temperature of the light.
Soft, diffused light — light that comes from a large source relative to its distance from the subject, like an overcast sky or a large softbox — wraps around the subject gently. Shadows are gradual rather than sharp, contrast is moderate, and the overall impression is warm, approachable, and intimate. This is the light that flatters most people, softening lines and creating a smooth tonal transition across the face.
Hard, directional light — from a small source at distance, like the direct midday sun or an unmodified strobe — creates sharp shadow edges, high contrast, and a more dramatic, sculptural quality. It is demanding light that does not flatter most faces, but in the right context — a character portrait, an editorial look, a deliberate atmospheric choice — it can be precisely what the image calls for.
Understanding which quality of light serves your subject is the first decision in any portrait session.
Natural Light: Reading and Chasing the Sun
Natural light is the starting point for most of our outdoor work on the South Shore, and it is a dynamic variable that requires constant awareness and adaptation.
The Golden Hour on the Massachusetts Coast
The golden hour — the period roughly 30 to 90 minutes before sunset and 30 to 90 minutes after sunrise — is the standard reference point for quality outdoor portrait light, and for good reason. When the sun is low on the horizon, three things happen simultaneously: the light becomes warmer in color temperature (more orange-amber rather than white-blue), it becomes more directional (lighting subjects from the side and slightly behind rather than from directly overhead), and it becomes softer relative to the strength of the shadows it creates.
On the South Shore, sunset times and the specific quality of late-afternoon light vary significantly by season and location. In high summer, golden hour at Duxbury Beach or Rexhame Beach in Marshfield begins around 7 PM and lasts until nearly 8. By mid-October, it is compressed into a 45-minute window starting around 5:15. In November and December, the sun drops low enough by mid-afternoon that you can start getting usable portrait light as early as 3 PM.
Knowing these windows and planning sessions around them is not optional — it is the difference between consistently beautiful outdoor work and constantly fighting conditions that are working against you.
Open Shade: Underrated and Underused
Open shade — an area that receives no direct sunlight but is open to the sky — is one of the most reliable natural light sources for portrait photography, and one of the most overlooked. On a bright midday, stepping your subject under a tree canopy or alongside a building that blocks direct sun gives you large, soft, directional light from the open sky above. The contrast between the shaded subject and the bright background can be managed with exposure.
The quality of light in open shade is flattering to most faces because the sky acts as a very large softbox — enormous relative to the subject's distance from it, producing gradual shadows and smooth tonal transitions. Color temperature in open shade tends toward blue, which can be corrected in post-processing or pre-empted by adjusting the white balance setting toward the warmer end of the daylight range.
For family portrait sessions on sunny summer days, open shade is often the best available option. The light at Nantasket Beach at 2 PM on a cloudless July day is too harsh for flattering portraits; moving the family into the shade of the seawall or the dunes frequently produces better results than waiting for the golden hour or fighting the direct sun with reflectors.
Overcast Light: A Portrait Photographer's Secret Weapon
The most consistent, lowest-maintenance natural light for portrait photography is a slightly overcast sky. The cloud cover acts as a giant diffusion panel for the sun, producing soft, even, essentially shadowless light that is extremely flattering to most faces. Color temperature is neutral to slightly cool, which is easy to adjust.
The limitation of overcast light is that it is directionless — shadows are so soft as to be nearly absent, which reduces the three-dimensional sculptural quality of a portrait. The workaround is to position the subject so that the sky is more open in one direction, creating a slight imbalance that functions as a soft directional light.
Backlighting: Managing the Most Difficult Natural Light
Backlighting — positioning the subject with the light source directly behind them — is one of the most beautiful and one of the most technically demanding natural light setups. When it works, the light wraps around the edges of the subject's hair and shoulders with a warm, luminous quality that is hard to achieve with any other approach. The subject's face is lit by open sky (or a reflector), and the interplay between the warm backlight and the cooler ambient fill creates depth and glow.
When it fails, the background is blown out, the face is underexposed, or the lens is flaring in a way that degrades the image. The difference between a successful backlit portrait and a failed one comes down to exposure management, positioning, and the use of a reflector or fill light to bring detail back into the face.
Chris frequently uses backlighting at beach sessions in the final 15 to 20 minutes before sunset, when the sun is at the lowest angle and the backlight is at its warmest and most manageable.
Studio Lighting: Control and Precision
Studio lighting exists to solve a fundamental problem of outdoor photography: you cannot control when the sun rises and sets, whether it will be overcast, or how the ambient conditions will behave on any given day. In the studio, all of these variables are under your direct control.
Photography Shark's studio at 83 E Water Street in Rockland is equipped for controlled lighting work using monolight strobes with various modifiers. The studio setup allows for consistent, repeatable results — which matters when you are shooting professional headshots for clients who need a specific look for their business or agency.
Softboxes and the Quality of Modified Light
The fundamental goal of most studio lighting modifiers — softboxes, umbrellas, beauty dishes, reflectors — is to increase the effective size of the light source relative to its distance from the subject. A bare strobe is a small, hard light source that creates sharp, unflattering shadows. A 60-inch octabox on the same strobe, positioned three feet from the subject, becomes a very large light source that wraps light around the face gently, mimicking the behavior of a large window on an overcast day.
For headshots and portrait work, a large softbox or octabox as a key light is the workhorse setup. It is flattering to most people, consistent, and controllable. The fill light — typically a reflector or a second, dimmer strobe on the opposite side — determines how much shadow detail is visible in the darker side of the face.
The ratio between the key light and the fill light sets the contrast level of the portrait. A 2:1 ratio (fill light at half the power of the key) produces a clean, even, commercial-style headshot. A 4:1 or 5:1 ratio produces deeper shadows and more dramatic contrast — closer to the look you get from the Rembrandt lighting pattern used in fine art portraiture.
Continuous Light vs. Strobe
Studio photographers work with two categories of artificial light: continuous light (which is on all the time) and strobe/flash (which fires at the moment of exposure). Each has its place.
Strobes are more powerful relative to their footprint and generate much less heat than equivalent continuous light sources. They freeze motion reliably. The limitation is that what you see in the viewfinder is not what you get — you are previewing the ambient light and estimating how the strobe will modify it. Experienced photographers develop a reliable intuition for this, but it requires practice.
Continuous lights — LED panels are the current standard — let you see exactly what you are getting in real time, which makes them more accessible for beginners. For video work and some live streaming applications, continuous light is the only practical option. For still portrait work, strobes are generally preferred for their output consistency and the flexibility they offer in controlling ambient light.
Combining Natural and Artificial Light
Some of the most effective portrait lighting setups are hybrid approaches that use a natural light source as the primary light and an artificial source as fill or accent.
A common setup at Photography Shark for outdoor sessions on overcast or late-afternoon days: natural ambient light as the primary fill, and a small battery-powered strobe (typically fitted with a compact softbox) positioned at roughly 45 degrees to the subject as the key light. The strobe adds directionality and dimension to what would otherwise be flat ambient light, while the ambient light fills in the shadow side naturally. The result is a portrait with the feel of natural light and the structure of studio light.
This approach is particularly effective for graduation senior sessions where you want the South Shore environment visible and recognizable in the image, but also want the subject to stand out with professional-quality lighting rather than looking like an unlit person in a landscape photograph.
Posing in Relation to Light
Posing and lighting are inseparable in practice. How you position a subject's face relative to a light source determines which lighting pattern you get — and understanding those patterns lets you adapt to the available light rather than fight it.
The Key Lighting Patterns
Butterfly lighting (also called paramount or glamour lighting): The light source is placed directly in front of and above the subject, creating a small butterfly-shaped shadow beneath the nose. It is flattering on even, symmetrical faces with good cheekbone definition.
Loop lighting: The light is slightly to the side and above, creating a small loop shadow under the nose on the shadow side of the face. It is the most commonly used portrait lighting pattern because it is flattering on a wide range of face shapes.
Rembrandt lighting: The light is at approximately 45 degrees to the side and elevated above eye level, creating a distinctive triangle of light on the shadow-side cheek. It is more dramatic than loop lighting and adds strong three-dimensional character to a portrait.
Split lighting: The light is positioned directly to the side, dividing the face evenly into a lit half and a shadow half. It is the most dramatic of the common patterns and is used sparingly in commercial and editorial portrait work.
For most of Photography Shark's commercial headshot work, we use loop lighting — sometimes with a subtle Rembrandt quality for subjects with strong facial structure — because it is consistently flattering and professional without being overly dramatic.
Post-Processing and Light Refinement
Editing software — Lightroom and Capture One are the industry standards — allows for significant refinement of the light after capture. The most important tools for portrait light work are exposure (the overall brightness of the image), highlights and shadows (the brightness of the brightest and darkest parts of the image independently), and local adjustment tools like the radial filter and the graduated filter, which allow you to adjust exposure in specific areas of the frame.
These tools are extensions of the lighting process, not replacements for it. A well-lit image requires minimal post-processing to look its best. A poorly lit image can be improved in post, but rarely to the level that a well-lit image achieves without intervention.
Chris's post-processing approach with Sony files — which produce excellent dynamic range in RAW format — focuses on natural skin tone accuracy, even tonal distribution across the face, and consistent color temperature. The goal is a final image that looks like the best version of the actual moment, not like it was heavily processed.
Ready to Book Your Session?
At Photography Shark in Rockland, MA, every session is built around deliberate, intentional lighting — whether that means chasing the golden hour along the South Shore coastline or setting up controlled studio lights for a Boston headshot. We serve clients across the South Shore and Greater Boston for headshots, senior portrait packages, and family photography.
Frequently Asked Questions
Why do professional portrait sessions often require a specific time of day?
Natural light changes dramatically throughout the day. The golden hour — 30 to 90 minutes before sunset — produces warm, directional light that flatters faces and creates depth. Midday sun is harsh and creates unflattering shadows. Planning sessions around this window is one of the most important factors in consistent outdoor portrait quality.
What is open shade and why do portrait photographers use it?
Open shade is any area that receives no direct sunlight but remains open to the sky — under a tree canopy, alongside a building, under a beach umbrella. The sky acts as a large, soft light source that wraps around the face and minimizes harsh shadows. It is one of the most reliable options for sunny midday sessions at South Shore locations like Nantasket Beach.
How does Photography Shark handle indoor or studio portrait lighting?
The Rockland studio at 83 E Water Street uses a dedicated studio lighting setup — strobes with softboxes — that replicates and exceeds the quality of the best natural light, regardless of weather or time of day. This allows for consistent, repeatable results for headshots, maternity, boudoir, and family sessions.
Does overcast weather ruin outdoor portrait sessions?
No — overcast light is actually one of a portrait photographer's most useful conditions. Cloud cover acts as a giant diffusion panel for the sun, producing soft, even, shadowless light that is flattering to most faces. Photography Shark regularly shoots in overcast conditions along the South Shore with excellent results.
What is backlighting in portrait photography?
Backlighting places the light source behind the subject, wrapping warm light around their hair and shoulders. When executed correctly — with careful exposure management and a reflector or fill light for the face — it produces luminous, glowing portraits. Chris uses this technique regularly at beach sessions during the final 15–20 minutes before sunset.
Related Posts
You Might Also Like
About the Author
Chris McCarthy
Chris McCarthy has run Photography Shark Studios in Rockland, MA for over 10 years and 500+ sessions, with executive headshot work for Rockland Trust, Clean Harbors, M&T Bank, and McCarthy Planning; founder portraits for AI startups including Lowtouch.ai; product photography for South Shore brands like Lauren's Swim; and headshots across South Shore legal, medical, financial, and academic practices. Every session is personally shot and edited by Chris on Sony mirrorless and Godox strobe systems — no assistants, no outsourcing, no batch retouching. Galleries deliver in 3–5 business days. About Chris McCarthy →
Photography Shark · Boston & South Shore MA
Ready to Book a Session?
Professional headshots, senior portraits, boudoir, and model portfolios. Studio in Rockland, MA — 25 miles south of Boston. Sessions from $395.