Session Prep — 2026 Guide
What to Wear for a Professional Headshot
A complete wardrobe guide for professional headshot sessions: colors that photograph well, patterns to avoid, profession-by-profession advice, and a session-day checklist. From 500+ sessions at Photography Shark, Boston and South Shore MA.
The TL;DR
Four Rules That Cover 90% of Sessions
If you only remember four things from this guide, remember these.
01
Solid Colors
Solid mid-range tones hold detail, avoid visual noise, and work across every background.
02
Fitted, Not Baggy
Clothes that fit properly photograph better. Loose or oversized items add 10 lbs on camera.
03
Bring 2–3 Options
Different colors, different necklines, different formality levels. More is always better.
04
Steam Before Arrival
Wrinkles are visible in every frame. Steam or press outfits the morning of the session.
At a Glance
Headshot Wardrobe Facts
- Solid colors photograph more reliably than patterns; thin stripes and small checks moiré on most camera sensors.
- Navy, charcoal, burgundy, forest green, and warm neutrals are the most consistently flattering colors across skin tones in studio lighting.
- Pure white shirts blow out highlights under studio strobes; off-white, cream, and pale gray are safer choices.
- Pure black absorbs detail and removes shape; charcoal or dark navy reads as black in print but holds shoulder definition.
- Bring 2–3 wardrobe options to a 30-minute headshot session; bring 4–5 to a 60-minute session.
- Clothes should fit at the shoulders and collar; oversized or undersized shoulders are the most common reason a headshot reads as unprofessional.
- Avoid logos, slogans, and recognizable branding unless the headshot is for that brand specifically.
- For LinkedIn and corporate headshots, dress one level above your normal client meeting attire.
- For actor headshots, bring the range of looks you’d submit to casting (commercial, theatrical, character).
- Jewelry should be small and matte; large or shiny pieces draw the eye away from the face in close crops.
Colors That Work
Six Colors That Photograph Consistently Well
These colors hold detail under studio lighting, flatter a wide range of skin tones, and work across white, gray, charcoal, and environmental backgrounds. Any one of them is a safer bet than experimenting with brights or patterns.
Navy
Authoritative, flattering on nearly every skin tone. Works on white, gray, or dark backgrounds.
Charcoal Gray
Professional without looking severe. Pairs with any background.
Burgundy / Wine
Adds warmth and personality. Great for authors, speakers, creative professionals.
Forest Green
Modern and sophisticated. Photographs especially well on lighter backgrounds.
Slate Blue
A softer alternative to navy. Works well for approachable, client-facing roles.
Warm Neutrals
Camel, taupe, cream, and soft beige. Versatile and flattering across skin tones.
What to Avoid
Colors & Patterns to Skip
These create specific problems on camera that are hard to fix in post. When in doubt, choose something from the other list.
Pure Bleached White
Blows out under studio strobes. Use off-white or cream instead.
Neon & Fluorescent
Reflects unnatural color onto your face and pulls focus.
Thin Stripes
Create moiré patterns on camera — visible wavy interference lines.
Busy Florals
Compete with your face for the viewer’s attention.
Visible Logos
Distract and date the photo. Clothing with small brand marks is fine.
Shiny Fabrics
Satin and silk catch studio lights in distracting ways. Matte fabrics photograph cleaner.
By Profession
What to Wear by Headshot Type
Different use cases call for different wardrobe choices. The advice below is drawn directly from working sessions for our actor-roster sittings and our C-suite portrait calendar— different industries, the same studio lighting, very different rules about what to walk in wearing.
Actor Headshots
Bring the range of looks you submit to casting — a commercial clean look (soft colors, friendly tones), a theatrical or dramatic look (darker, stronger silhouette), and any specific type you work in (scrubs for medical roles, collared shirt for professional, leather jacket for edgy, etc.). Plain T-shirts and solid-color tops photograph best.
Executive & Corporate
Match how you present to clients. For most executives that’s a well-fitted suit or a sport coat with a button-down. Ties optional — the industry default has shifted. Darker suits photograph with more authority; mid-tones read more approachable.
LinkedIn Professional
The thumbnail is what matters. Solid colors, business casual through business formal, clean neckline. Avoid anything that looks cluttered at thumbnail size. Navy sweaters, charcoal blazers, and solid blouses are the default for a reason — they work.
Medical & Legal
Conservative, polished, trust-signaling. Solid colors in darker tones — navy, charcoal, forest. White coats are welcome for physicians (photograph a clean one, clinic-fresh). Attorneys should match the formality of court appearances.
Creative & Personal Branding
Your outfit can be more expressive — a bold color, a strong silhouette, an accessory that signals your brand. Still keep it solid, fitted, and intentional. Your headshot has to hold up across a year of marketing — skip the piece that feels trendy today.
Real Estate & Insurance
Approachable and polished. Blazer over a solid top works for most agents. The goal is trust — not intimidation. Mid-tones like slate blue, charcoal, and warm neutrals read as competent and friendly.
Authors, Speakers, Academics
Personality matters more here than formality. A jacket and interesting-but-not-loud top works well. Glasses, a favorite color, a signature piece — these signal identity and make for a more memorable headshot. Still solid, still fitted, still intentional.
Men
Men: What to Wear

- Button-downs in solid colors (white off-white, light blue, chambray) are a safe starting point
- Well-fitted jackets add structure — a sport coat over a plain tee is a modern business casual default
- Tailor anything loose. Shoulders should sit squarely, sleeves should hit the wrist bone
- Ties should be solid or have subtle texture — avoid thin stripes and bold patterns
- Fresh, recent haircut — not the day before (hair usually looks better 3–7 days after a cut)
- Shave or trim beards the morning of the session for clean edges
Women
Women: What to Wear
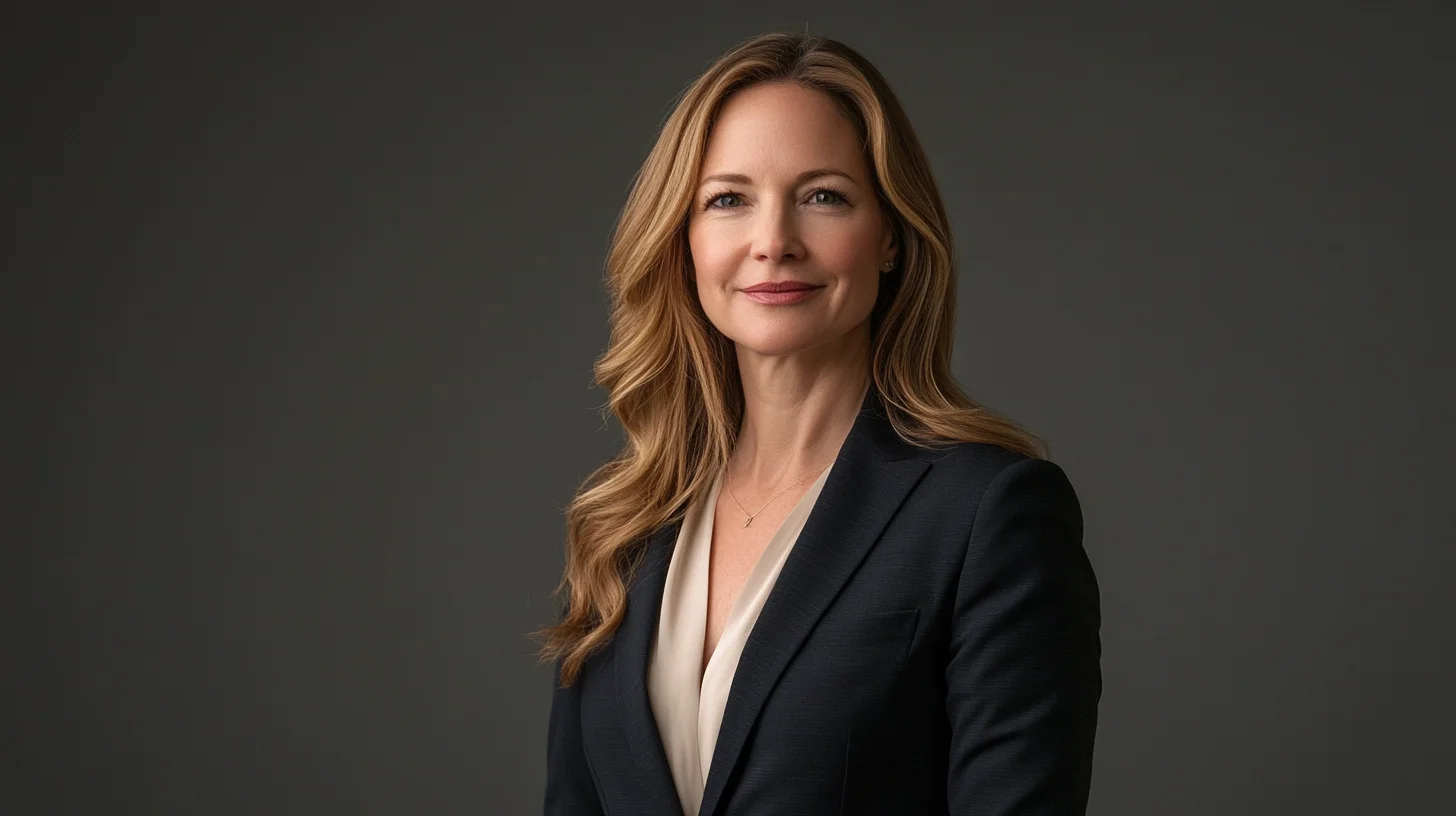
- Solid-color blouses, sweaters, or tops with a defined neckline photograph best
- Blazers add structure and authority — bring one even if you don’t plan to wear it
- Well-fitted, not tight. Things that pull, bunch, or gap read on camera
- Avoid V-necks that go too deep for your framing — the camera sees more than a mirror
- Hair styled the way you’d wear it for your most important client meeting
- Makeup a step stronger than daily wear — studio lighting washes out natural coloring
Accessories
Jewelry, Glasses, Makeup & Hair
Jewelry
Simple and intentional. Small studs, a pendant necklace, a watch. Avoid dangling earrings (move during the shoot) and anything reflective.
Glasses
Bring them. We can shoot some frames with, some without. If you always wear glasses professionally, keep them on. Anti-reflective coating helps prevent glare.
Makeup
One level stronger than you’d wear to work. Studio strobes flatten natural color. Matte finishes photograph cleaner than dewy. Avoid shimmer on the cheekbones.
Hair
3–7 days after a fresh cut usually photographs best (fewer flyaways, more natural fall). Style it as you would for your most important meeting.
Session Day
The Morning-Of Checklist
Six small things that make a visible difference in the final images. None of them take more than a few minutes.
- Steam or press every outfit the morning of
- Bring outfits on hangers — not folded in a bag
- Trim nails (hands often appear in headshots, especially three-quarter framing)
- Arrive 5 minutes early to decompress
- Hydrate the day before — skin reads better
- Skip heavy meals immediately before the session
FAQ
Headshot Wardrobe Questions
What colors should I wear for a professional headshot?
Solid mid-range colors photograph best: navy, charcoal gray, burgundy, forest green, slate blue, and warm neutrals like camel, taupe, and cream. These hold detail under studio lighting, work across multiple background colors, and do not compete with your face. Avoid neon, pure white, and busy patterns.
Should I wear black to a headshot session?
Black works on lighter backgrounds but can cause a floating-head effect against dark studio backdrops. If you love black, bring it — but also bring a mid-tone option like charcoal, navy, or burgundy. Professional headshot photographers will match your outfit to the appropriate background. At Photography Shark, we pair black outfits with white or gray backdrops.
Is white okay for professional headshots?
Bright white can blow out highlights under studio strobes and tends to look harsh. Off-white, cream, ivory, and soft beige hold detail much better and still photograph clean. If your brand or profession specifically requires white, a high-quality cotton in off-white is the safer choice than pure bleached white.
Should I wear a suit or business casual for my headshot?
Match your wardrobe to how you actually present to clients, not the formality level of your industry in general. An executive who dresses in business casual for client meetings should photograph in business casual. A lawyer who wears a suit to court should photograph in a suit. Authenticity reads on camera — overdressing looks stiff, underdressing reads as casual.
How many outfits should I bring to a headshot session?
Bring two or three options. One go-to outfit plus a backup in a different color. If your session includes outfit changes, bring an additional look. More options than you think you need is always better — most clients discover on the day that one option they were not planning to use turns out to be the best.
What should I avoid wearing for a professional headshot?
Avoid thin stripes (they moire on camera), busy patterns and florals, visible logos, pure bleached white, neon colors, shiny fabrics that reflect light, oversized or ill-fitting clothing, and anything wrinkled. Also skip dangling or reflective jewelry that can catch light unpredictably.
Go Deeper
Related Wardrobe Guides
Free download: The Headshot Guide puts this wardrobe advice in one PDF with glasses and grooming tips, posing, and the squinch.
Ready to Book
Book Your Headshot Session
Session Prep Done
Now Book the Session
Studio sessions from $395 · 10 retouched images · 3–5 day delivery. Wardrobe consultation included with every booking.
Book a Session