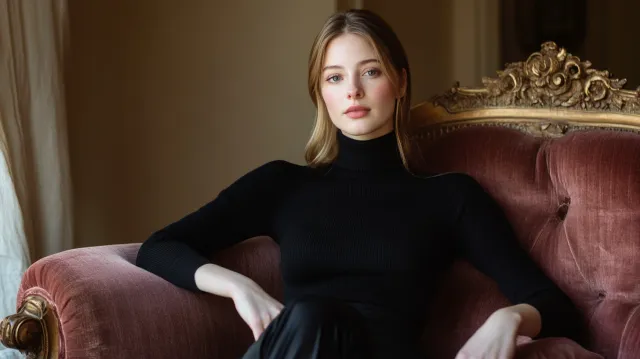
Boudoir Photography
Boudoir Poses for Beginners: A Complete Guide (15 Positions)
A complete boudoir posing guide for beginners — 15 flattering positions that consistently work for first-timers, with notes on what each does and why it works.
Chris McCarthy
Professional Photographer, Photography Shark · January 28, 2026 · Updated February 1, 2026
Posing anxiety is one of the most common pre-session concerns first-time boudoir clients mention. The fear is usually some version of "I don't know what to do with my body." The honest answer: you don't need to. Posing is guided actively throughout the session. If you are new to the genre entirely, the boudoir photography definition and overview covers what a session actually involves, the wardrobe spectrum, and how boudoir differs from adjacent genres like glamour and fine art nude.
That said, having a general sense of the pose categories that work well can reduce pre-session nerves. Here are 15 positions that consistently produce strong frames for first-time boudoir clients, with brief notes on why each works.
I have guided hundreds of boudoir clients through their first session at my Rockland studio, and the concerns are always the same at the start — and always resolved by the end.
Standing Poses
1. Contrapposto (weighted leg)
Weight shifted onto one leg with the other slightly bent. Torso naturally tilts, creating S-curves. This is the most reliable standing pose in boudoir because it works for essentially every body type and generates natural curve.
2. Wall lean (back)
Back against a wall, one leg raised with foot flat against the wall, arms relaxed. Creates extended leg line and intimate eye contact. Works beautifully with oversized shirts worn open.
3. Wall lean (front)
Standing with hands or forearms against a wall, leaning in slightly. The body angles away from the camera creating shape. Often produces very strong profile-adjacent frames.
4. Hands in hair
Standing, arms raised to hair, creating an upward line that elongates the frame. Produces elegant, natural-feeling expressions because the motion is familiar. Works especially well with longer hair.
5. Turned profile with look-back
Body turned away from camera, head looking back over shoulder. Classic for good reason — creates visual interest through the turn and generates a confident, slightly playful expression.
Seated Poses
6. Edge of bed, one leg extended
Seated on the edge of the bed, one leg extended to the floor, other leg drawn up slightly. Combines extension with intimacy. Reliable across body types.
7. Cross-legged on bed
Seated cross-legged in the center of the bed, hands behind for support or on knees. Relaxed, conversational energy. Often produces some of the most naturally emotional frames of a session.
8. Kneeling with back arch
Kneeling on the bed, back slightly arched, hands reaching up to hair or behind the head. Creates strong line through the torso and emphasizes body posture.
9. Side-seated with extended leg
Seated with legs to one side, one extended, one bent. Hip slightly turned. Creates curve without requiring complicated positioning.
Reclining Poses
10. Side-lying, fully extended
Lying on one side with body extended — one leg straight, one slightly bent for shape. Classic reclining pose. Reliable and flattering across essentially every body.
11. Side-lying with bent knee up
Same starting position, but the top leg bent and raised. Adds visual line and shape. Produces images with elegant negative space.
12. On back, one leg raised
Lying on back, one leg raised vertical or bent. Reading from above or from the side. Creates shape and dimension in what would otherwise be a flat position.
13. Face down, chin in hands
Lying on stomach, propped up on forearms, chin resting on hands. Intimate, conversational, often produces the most vulnerable frames of a session.
14. Curled, on side
Lying on side, knees drawn in slightly, arms soft. Cocoon-like, quieter energy. Good for mid-session breaks that produce surprisingly strong frames.
Close-Framed Portrait Work
15. Shoulders-up with connection to camera
Not a body pose — a framing category. Shoulders-up crops focused on eye contact and expression. Works at any body position but often gets the strongest emotional range of the entire session. These are usually the keeper frames clients return to. Clients who want these to land well often think carefully about hair and makeup for boudoir, since close-framed work puts the face at the center of everything.
What Makes Poses Actually Work
Reading a list of poses doesn't create good images. What creates good images is the interaction between pose, lighting, expression, and timing — most of which happens in real time during the session.
A few principles that distinguish photographed-well poses from photographed-poorly ones:
Extension over compression. Limbs fully extended almost always photograph better than limbs tucked in. Reach for the edge of the frame.
Slight turns rather than square-on. The body rarely photographs well facing directly toward or away from the camera. Slight angles create dimension.
Weight distribution. Where your weight is matters more than where your body is. Shifted weight creates curve; evenly distributed weight flattens.
Relaxed hands. Hands tense up unconsciously during sessions. A recurring photographer note: soften the hands. Claw hands show up in images in ways you don't expect.
Breath. Holding breath produces stiffness. Breathing normally produces natural frames.
Pre-Session Prep for Poses
You don't need to rehearse, but if you want to prepare:
Try a few poses in a full-length mirror. Not to memorize, but to understand what your body does and feels like in different positions. This reduces the "this is weird" reaction during the actual session.
Watch your body in motion, not still. The best poses often come between held positions. Moving through poses on camera produces the best frames.
Think about what you want images to feel like, not look like. Energy, mood, intimacy level — these are more useful to communicate during the consultation than specific pose requests.
For body-type-specific pose considerations, see plus size boudoir photography and petite body boudoir: poses & outfit choices.
What to Flag at Consultation
If there are specific body concerns that shape which poses will work, say so during the consultation:
- Back issues that limit reclining or arching
- Neck issues that limit looking back over shoulders
- Wrist or elbow problems that limit supported poses
- Scar visibility concerns that affect posing angles
- Specific feature anxiety (belly, arms, legs) that shapes camera angle choices
This lets the photographer plan the pose sequence accordingly, rather than discovering limitations mid-session.
How Posing Direction Actually Sounds in the Room
A frequent first-session question from beginners is some version of "how much will I be told what to do?" The honest answer: continuously. To give a realistic sense of the verbal texture during a session, here is the kind of direction that flows during an active shooting block. None of these are scripts; they are the recurring micro-cues that shape frames.
- "Soften the hand — drop the fingers a little, like you don't care."
- "Chin out toward me, then down two inches. There — hold."
- "Roll your weight onto the front leg. Other knee, just bend it slightly."
- "Bigger breath in — hold the shoulder back as you exhale."
- "Eyes to the window. No, slower — let your head follow your eyes."
- "Hand to your hair, but don't grab — just let your fingers rest in it."
Most of the session sounds like that. There is rarely a long stretch where the client is left to figure out what to do next. The expectation that you'll be silently judged for not knowing how to pose is exactly opposite to how the studio actually runs.
The Difference Between Held Poses and Movement Poses
Beginner clients sometimes assume boudoir is a series of perfectly still held poses. The reality is closer to the opposite: most of the strongest frames come from micro-movement within a broader posture. The pose is a starting point; the actual image happens in a small range of motion around it.
Held positions are used for some setups — close-framed portraits with specific eye contact, certain reclining poses where stillness reads as serene, classic standing references. These get held for short durations (seconds) while the photographer adjusts framing or settings.
Movement-within-position is the default for most active shooting. Tiny shifts in chin, shoulder, hip, hand placement — captured in continuous bursts rather than singular shots. The photographer is shooting through the movement, not waiting for stillness. This is why expressions stay alive across a session: nothing is being held long enough to freeze into stiffness.
Knowing this distinction reduces a specific kind of beginner anxiety: the worry about having to hold a pose perfectly. You do not. You move through a range, and the camera captures the parts that work.
How Posing Connects to Wardrobe Changes
A practical detail beginners often don't anticipate: posing strategy shifts deliberately across wardrobe changes within a single session. The reasoning is structural — different pieces of clothing photograph well in different positions, and an experienced session pulls posing categories that match what the client is wearing.
A robe and bralette setup, for example, leans heavily on standing and seated poses where the robe drapes and creates lines. A full lingerie set with structured pieces leans into reclining and stretched poses where the silhouette of the wardrobe shows clearly. An oversized partner's shirt setup pulls toward seated and intimate close-frame work where the shirt's drape creates visual softness.
You do not need to plan this match yourself. The photographer reads what the wardrobe needs and pulls poses accordingly. But it explains why the session feels different in tempo and movement across each wardrobe change — that's deliberate, not random.
When Beginner Poses Are Not the Right Approach
Worth saying briefly: not every client should default to the beginner pose vocabulary. Clients with prior modeling experience, clients on a second or third session, and clients with specific stylistic visions sometimes benefit from a more advanced posing approach — more athletic positions, more dramatic framing, posing that pushes against the conservative defaults that make beginner poses reliable.
The consultation conversation is where this gets calibrated. If the beginner-pose vocabulary outlined above does not match what you want from your session, say so. The studio supports a wider posing range than this list represents; the list is built for what works first-session, not what's possible across the broader practice.
Want every pose in one place? The free 42-pose boudoir posing guide covers what to wear, getting ready and what happens on the day, with tips for each pose.
Ready to Book Your Session?
Get in touch to schedule your consultation. Photography Shark is based in Rockland, MA, serving Boston and the full South Shore.
Related reading: Boudoir payment options explained · Navigating pre-session nerves · 10 perfect outfit ideas for boudoir shoots · Boudoir services & pricing · South Shore boudoir session packages
Frequently Asked Questions
Do I need to practice poses before my boudoir session?
No. Posing is guided actively throughout the session. Most clients are amazed at how much direction they receive — it's not a situation where you're left to figure out poses on your own. Reading about poses in advance can reduce anxiety, but you don't need to memorize anything.
What if I can't get into certain poses?
Not every pose works for every body or comfort level. A good photographer has dozens of alternatives for any given look and adapts quickly if a specific position isn't landing. Never stay in a pose that hurts or feels wrong — say so, and we reset.
Do boudoir poses require flexibility?
No. The strongest boudoir frames typically come from comfortable, natural-feeling positions — not yoga-level flexibility. If a pose feels like a stretch you're straining to hold, it probably isn't producing your best frames.
How long do you hold each pose?
Most poses are held for seconds, not minutes. The session moves continuously through micro-adjustments within each broader pose — not freeze, snap, next. This keeps expressions alive and bodies natural.
Should I smile or keep a serious expression?
Both, across the session. Strong boudoir galleries typically include a range — playful, serene, confident, intimate. No single expression works for every frame. The photographer cues different emotional notes throughout the shoot.
Related Posts

You Might Also Like
About the Author
Chris McCarthy
Chris McCarthy has run Photography Shark Studios in Rockland, MA for over 10 years and 500+ sessions, with executive headshot work for Rockland Trust, Clean Harbors, M&T Bank, and McCarthy Planning; founder portraits for AI startups including Lowtouch.ai; product photography for South Shore brands like Lauren's Swim; and headshots across South Shore legal, medical, financial, and academic practices. Every session is personally shot and edited by Chris on Sony mirrorless and Godox strobe systems — no assistants, no outsourcing, no batch retouching. Galleries deliver in 3–5 business days. More about the photographer →
Photography Shark · Boston & South Shore MA
Ready to Book a Session?
Professional headshots, senior portraits, boudoir, and model portfolios. Studio in Rockland, MA — 25 miles south of Boston. Sessions from $395.