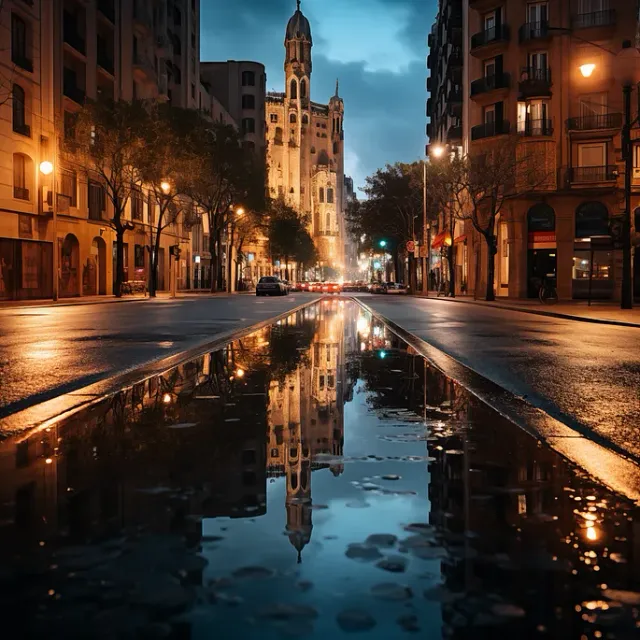
Photography Tips
A Practical Guide to Vacation Photography
A practical vacation photography guide — gear prep, light timing, composition, and post-processing from Chris McCarthy of Photography Shark.

Chris McCarthy
Professional Photographer, Photography Shark · September 4, 2024 · Updated December 9, 2025
The photographs you take during a vacation are the artifact of the trip — the thing that outlasts the tan, the feeling, and the specific memory of any single moment. Two people can take the same trip to the same destination and come home with completely different images: one with a collection of snapshots that captures the surface, and one with images that make you feel like you were there.
The gap between those two outcomes isn't usually about the camera. It's about intention, timing, knowledge of light, and a basic understanding of composition that changes how you see and respond to everything in front of the lens.
This guide covers the practical photography skills that elevate vacation images from documentation to storytelling — whether you're shooting with a Sony mirrorless like Chris McCarthy at Photography Shark, a mid-range DSLR, or a recent iPhone. The principles translate across all of them.
Before You Go: Preparation That Pays Off
Know Your Gear Before You Need It
The worst time to learn how your camera works is when the image opportunity is happening in front of you. Before any trip, spend time with your camera in a low-stakes environment. Practice changing settings quickly. Know where your exposure compensation is, how to adjust white balance, how to switch between autofocus modes, and how to access your manual controls.
If you're traveling with a new camera or a new lens, take it out for two or three sessions before the trip. Familiar equipment responds to what you need without demanding your attention.
Research the Location Visually
Photography preparation for travel looks different from general travel research. Beyond knowing what to see and do, research specifically:
- What does the light look like at different times of day? East-facing subjects are best in the morning; west-facing subjects are best in the evening. Indoor spaces with skylights or specific window orientations have predictable light patterns.
- What do the most compelling images from this location look like, and what's being used to create them? Look at a range of photographs from your destination — not to copy them, but to understand what makes the place photographically interesting and to identify the less-photographed angles and perspectives.
- Are there specific weather conditions that produce distinctive images? Fog in San Francisco, monsoon light in the American Southwest, snow at Yellowstone, golden autumn light in New England — these aren't just weather but photographic opportunities.
Carry the Right Gear for Travel
The camera you have with you is always better than the camera you left in the hotel. For travel, this means striking a balance between capability and portability.
A mirrorless system with a versatile 24–70mm equivalent lens covers the majority of travel photography situations well. Add a compact 50mm or 35mm prime for low-light work in restaurants and museums. Keep a lens cloth and small cleaning kit accessible.
What you actually need:
- Extra memory cards — more than you think
- Two charged batteries, minimum, with a charger
- A lens cloth
- A small, packable tripod or a good gorilla-style flexible tripod for low-light and long-exposure work
What you often don't need:
- A full kit bag of lenses — this guarantees you'll leave some of them in the room every day
- Heavy, bulky equipment that makes you hesitate to take the camera out
Understanding Light: The Variable That Changes Everything
Light is the raw material of photography. All the compositional skill and technical precision in the world cannot compensate for bad light. Understanding light — how it changes through the day, how weather affects it, and how to find and use it — is the most important skill in travel photography.
Golden Hour
The 60 to 90 minutes after sunrise and before sunset are called "golden hour" because the sun's position near the horizon creates light that is warm in color temperature, directional in angle, and soft in quality — the combination that makes landscapes, architecture, and people all look extraordinary.
On the South Shore of Massachusetts, golden hour light over Duxbury Bay, across the marsh at Fourth Cliff in Humarock, or reflected off Boston Harbor during summer evening sessions is transformative. The same logic applies anywhere you travel.
Make it a habit to know sunrise and sunset times at every destination, and plan at least one session during each golden hour period. Wake up early for the morning. Linger after dinner for the evening. The images you get during these windows are disproportionately strong compared to what midday produces.
Overcast Light
Overcast days are frequently undervalued by travelers who only want to shoot in sunshine. An even overcast creates soft, diffused light with no harsh shadows — excellent conditions for portraits, street scenes, and intimate details. Colors are often more saturated in overcast light. Faces photograph beautifully without squinting or harsh shadows from direct sun.
Don't put the camera away when clouds arrive. Change your subject matter if necessary — details, textures, food, interiors, and candid moments often work better in soft overcast light than the wide landscape shots you'd plan for golden hour.
Harsh Midday Light
Direct overhead sun creates the most challenging conditions in travel photography. Shadows fall straight down, creating dark circles under eyes in portraits and flat, unflattering light on faces. Highlights on light surfaces blow out. Contrast is extreme.
Strategies for midday:
- Work in shade. Open shade under a building, an overhang, or large trees provides even, controlled light without harsh shadows
- Use the built environment. Many of the world's most photogenic interior spaces — cathedrals, markets, courtyards — are best photographed at midday when overhead skylights or open roofs fill them with diffused light
- Shoot for color and geometry rather than light quality. Saturated colors, bold patterns, and strong architectural geometry can make compelling images even in flat light
- Go inside. Many of the best shots from any trip are interior moments — meals, hotels, museums, markets — where outdoor light conditions are irrelevant
Composition: Building Images That Hold Attention
A photograph is a two-dimensional frame within which you're organizing visual information. The choices you make about what to include, where to place it, and how to orient the frame determine whether the image tells a story or just records a scene.
The Rule of Thirds — and When to Break It
Place your main subject not at the center of the frame but at one of the intersections of an imaginary three-by-three grid. This creates images that feel dynamic and draw the viewer's eye through the frame naturally.
The rule of thirds is a starting point, not a law. Centered compositions work powerfully when the subject has radial symmetry — looking through a doorway into a courtyard, a reflection in still water, a face with strong symmetric features. The skill is knowing when the rule helps and when breaking it serves the image better.
Leading Lines
Roads, rivers, paths, fences, walls, shorelines, and corridors all create leading lines — visual elements that draw the viewer's eye from one part of the frame toward another, usually from foreground toward background. Leading lines create depth and movement in otherwise flat two-dimensional images.
Travel destinations are full of leading lines if you look for them: the boardwalk at Duxbury Beach, the harbor walls at Scituate Light, the corridors of European train stations, the converging lanes of highway systems photographed from bridges. Train yourself to see them and position yourself so they serve your composition.
Foreground Interest and Depth
The most common weakness in landscape travel photography is the empty foreground — images where the interesting thing is in the background and there's a dead zone between the camera and the subject. Including something interesting in the foreground creates depth and gives the viewer a visual entry point into the image.
Foreground elements can be almost anything: rocks, grass, wildflowers, architectural details, a person's outstretched arm, local objects. The key is that the foreground element is interesting in itself and that it relates meaningfully to the background subject.
Frame Within a Frame
Using an architectural or natural element to frame your subject within the image creates layers, depth, and context. A doorway framing a street scene. A window frame around a landscape. Tree branches arching over a subject. Rock formations framing a distant mountain. This technique adds sophistication to travel images without requiring any post-processing.
Photographing People While Traveling
The human element often makes the difference between a travel photograph that feels alive and one that feels like a property listing. People in an environment communicate scale, culture, and the fact that this is a real place where real lives happen.
Candid Photography Ethics and Technique
Photographing people candidly in public places is legal in most countries, but ethics matter beyond legality. The general principle: photograph people in ways that respect their dignity. Avoid images that mock, degrade, or exploit. In contexts where photographing individuals would feel intrusive — religious ceremonies, private grief, children in vulnerable situations — ask before shooting or don't shoot.
Technically, candid photography requires:
- A longer focal length that allows you to capture natural moments from a respectful distance without intruding on them
- Patience — waiting for the right moment to appear rather than forcing it
- Working from the hip for street scenes where raising the camera to your eye changes the behavior of the people in front of you
Asking Permission
In many situations — a market vendor, a street performer, a striking face in a cafe — asking permission produces better images than stealing shots. The permission ask is itself a human interaction that often produces exactly the kind of genuine expression and engagement that makes a portrait compelling.
Learn how to ask in the local language. Even a basic attempt at "may I photograph you?" communicates respect and often gets a warmer response than the same ask in English.
Including Your Own Travel Party
The people you travel with are part of the story of the trip. Don't neglect portraits of the people you're with — with actual attention paid to light, composition, and expression, not just snapshots.
During good light (golden hour, open shade, overcast), slow down for a few minutes and make actual portraits of your travel companions. These images — showing someone you love in a meaningful place, in beautiful light, with genuine expression — are often the photographs you value most years later.
Photographing the South Shore as a Destination
If you're a visitor to the South Shore of Massachusetts — or a local approaching your own region with a traveler's eye — there are specific locations and conditions worth knowing about.
Scituate Light and the Harbor
Scituate Light is one of the most photographed landmarks on the South Shore. The lighthouse itself is striking, but the surrounding harbor area offers more diverse subject matter: fishing vessels, the old lifesaving station, the rocky shoreline south toward Egypt Beach. Early morning in summer, before the harbor area gets crowded, is the optimal time — the light is warm, the water is calm, and you have the space to set up compositions deliberately.
Duxbury Beach and Bay
Duxbury Beach is one of the longest barrier beaches in Massachusetts. In summer, it photographs beautifully as a landscape in golden hour light. In fall and winter, the combination of dramatic skies and empty beach creates images with a completely different character — quieter, more elemental.
Duxbury Bay, viewed from the town side, offers calm water reflections and boat traffic that changes character throughout the day.
Hingham Harbor and Worlds End
World's End in Hingham is extraordinary — a Frederick Law Olmsted-designed landscape of rolling drumlins with views across to Boston. In fall, the tree canopy turns and the combination of color, water views, and open sky makes it one of the best landscape photography locations in eastern Massachusetts.
Hingham Harbor area, particularly around the Town Wharf, offers maritime subjects with a quieter scale than Boston.
Plymouth
Plymouth's historic downtown, the waterfront near Pilgrim Memorial State Park, and the views across Plymouth Bay toward the barrier beach all offer strong photographic material. Cape Cod Bay seen from Plymouth Beach at golden hour in late summer is remarkable.
Post-Processing: Enhancing Without Distorting
The Purpose of Editing
Editing serves to finish the image that the camera started — correcting exposure inconsistencies, refining color, removing distractions, and sometimes making compositional adjustments through cropping. It is not about making the scene look like something it wasn't.
Heavy-handed editing — oversaturated colors, extreme HDR processing, distorted tone curves — creates images that feel manufactured rather than observed. The goal is images that feel like the scene as you actually experienced it, at its best.
A Basic Editing Workflow
For most travel images, a straightforward workflow covers the essentials:
- Exposure and white balance: Correct these first. A well-exposed image with accurate color is the foundation for everything else.
- Highlight and shadow recovery: Pull back blown highlights and open up blocked shadows to restore detail in both extremes.
- Color grading: Make subtle adjustments to the overall color feel of the image — warmer or cooler, more or less saturated — to bring it closer to how you remember the scene.
- Sharpening and noise reduction: Most cameras produce images that benefit from a small amount of additional sharpening in post. High-ISO images need noise reduction, applied carefully to avoid destroying fine detail.
- Crop and straighten: Fix horizon lines. Tighten compositions that were loose in-camera. Remove distracting elements at the edge of the frame.
Lightroom, Lightroom Mobile, and Apple Photos all handle this workflow competently. The best editing is editing you can't see — the viewer feels the quality of the image without attributing it to post-processing.
When to Consider Professional Photography on Vacation
Sometimes the best images from a vacation are ones you hire someone to make for you. A professional portrait session while you're traveling — with your family in a meaningful location, or as a solo celebration of a milestone trip — produces images that none of the snapshots will match in quality or permanence.
Photography Shark serves families and individuals who visit the South Shore and want professional portrait sessions in this environment. Whether it's a beach session in Duxbury, a session at World's End in Hingham, or a waterfront shoot in Scituate, we know these locations and the light conditions throughout the year.
Our family photos sessions work particularly well for visiting families who want professional portraits in a location that matters to them. For solo travelers or couples, our studio photo shoot sessions offer a controlled, high-quality environment for portraits that go well beyond vacation snapshots.
---
Ready to Book Your Session?
If you're visiting the South Shore and want professional portraits in one of New England's most beautiful coastal environments, or if you're a local family ready for portraits that actually do justice to this remarkable region, Photography Shark is ready.
Contact us today to discuss your session, check dates, and start planning images you'll be proud of for years to come.
Scituate headshots · Headshot photographer · Plymouth · Hingham, MA headshot studio
Frequently Asked Questions
Can Photography Shark shoot vacation or travel portraits for families visiting the South Shore?
Yes. If you are visiting the South Shore of Massachusetts and want professional portraits — at the beach, in Plymouth, or at a scenic South Shore location — Chris McCarthy can photograph your family or group. Sessions start at $395 for families.
What gear does Photography Shark recommend for travel photography?
Chris shoots a Sony full-frame mirrorless with a 24–70mm equivalent lens for most travel and location work, supplemented by a compact prime for low-light situations. The key is gear you know well before you travel, not the newest body.
What time of day produces the best vacation photos outdoors?
The hour after sunrise and the hour before sunset — golden hour — produces warm, flattering light that is nearly impossible to replicate at midday. Planning your most important shots around these windows makes a measurable difference.
Does Photography Shark offer vacation portrait sessions at South Shore beaches like Scituate or Duxbury?
Yes. We regularly photograph at South Shore beaches including Scituate, Duxbury, Marshfield, and Cohasset. Outdoor portrait Studio sessions start at $395 and we schedule around golden-hour light whenever possible.
How long after a vacation portrait session will I receive my edited photos?
Edited images from Photography Shark are delivered within 3–5 business days for headshots and studio sessions.
How do I book Photography Shark for a South Shore location session?
Contact us at photographyshark.com or visit the studio at 83 E Water Street, Rockland MA 02370. We recommend booking at least 2–3 weeks in advance, especially for summer beach sessions.
Related Posts



You Might Also Like
About the Author
Chris McCarthy
Chris McCarthy has run Photography Shark Studios in Rockland, MA for over 10 years and 500+ sessions, with executive headshot work for Rockland Trust, Clean Harbors, M&T Bank, and McCarthy Planning; founder portraits for AI startups including Lowtouch.ai; product photography for South Shore brands like Lauren's Swim; and headshots across South Shore legal, medical, financial, and academic practices. Every session is personally shot and edited by Chris on Sony mirrorless and Godox strobe systems — no assistants, no outsourcing, no batch retouching. Galleries deliver in 3–5 business days. About Chris McCarthy →
Photography Shark · Boston & South Shore MA
Ready to Book a Session?
Professional headshots, senior portraits, boudoir, and model portfolios. Studio in Rockland, MA — 25 miles south of Boston. Sessions from $395.