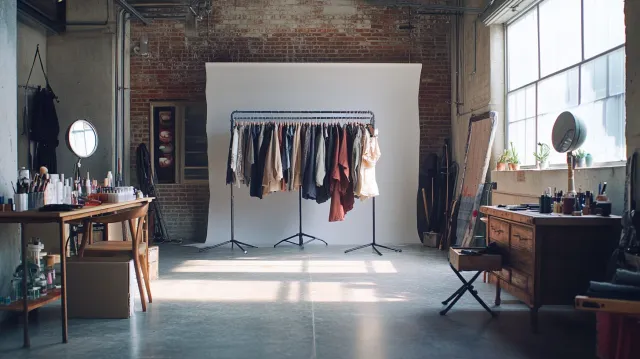
Headshots
Tips for Professional Headshots: A Pre-Session Checklist
Practical pre-session preparation for professional headshots — what to do the week before, the day before, and the morning of your session.
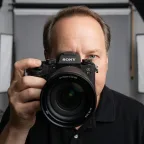
Chris McCarthy
Professional Photographer, Photography Shark · May 6, 2026
The work that determines whether a professional headshot session goes well happens before you walk through the studio door. The session itself is largely the photographer's work — direction, lighting, framing, retouching all happen during and after. What you control is preparation. This guide covers what to do in the week, day, and morning before your session to make sure you arrive ready.
The Week Before
Schedule a haircut 7-10 days out
Hair settles into its natural shape about a week after a cut. A haircut on the day or day-before of the session photographs as "freshly cut" — visible scissor lines, hair that hasn't relaxed into its post-cut texture, sometimes a slightly artificial polished look. Hair cut 7-10 days before photographs as "well-groomed" — natural shape, settled texture, intentional but not overdone.
If you can't time the haircut precisely, the right call is to push it earlier rather than later. A haircut 3-4 weeks before the session photographs as normal hair. A haircut the day before photographs as a fresh haircut.
Plan your wardrobe
Assemble 2-3 wardrobe options that match your professional context. The basic combination most professional sessions benefit from:
- One more formal option (blazer + button-down for executive/legal/finance contexts — see executive headshot sessions in Boston for how wardrobe calibrates at the leadership level)
- One more casual professional option (button-down or sweater for tech/healthcare/modern contexts)
- Optional third look for actor or speaker work that benefits from variety
Try each on. Verify:
- Fit is right (no awkward bunching, gaps, or pulls)
- No visible wear (frayed cuffs, missing buttons, wrinkled collars)
- Color works against your skin tone
- No busy patterns that compete with your face
For depth, see headshot wardrobe guide for men and headshot wardrobe guide for women.
Your photographer will typically have several backdrop options available, and the right choice depends on your industry and where the image will be used. If you want to think about this in advance, the background selection guide for professional headshots breaks down which colors and textures work for each field.
If you have facial hair
Trim 1-2 days before the session, not the morning of. Same logic as the haircut — it settles into shape. A morning-of trim can look slightly uneven in the high-contrast lighting of a studio session.
Drink water normally
Skin tone reflects hydration. Aim for normal water intake all week — not a sudden hydration push the day before, which doesn't actually help and can leave you bloated.
Get normal sleep
The night before is too late to improve your sleep, so the priority is consistent sleep across the week. Bags under the eyes, fatigue, and dull skin tone all show in studio lighting.
The Day Before
Iron everything
Wrinkles photograph more visibly than they look in person. Studio lighting is bright and directional, which catches every fold. Iron all wardrobe options the day before, hang them, and bring them to the session on hangers (not folded in a bag).
Lay out the wardrobe
Visible wardrobe the morning of the session removes one decision from a day already busy with logistics.
Charge a backup phone for navigation
If you're driving to a studio you haven't been to, having a charged phone with the address pre-loaded prevents arrival stress.
Don't try anything new
Not the day to try a new haircut, new wardrobe, new makeup product, new exfoliant, new diet. Stick with what you know works for your face.
Get a normal night of sleep
Don't try to "extra-sleep" the night before — over-sleeping produces puffy eyes and a slow start. Normal sleep schedule is what matters.
The Morning Of
Light meal 1-2 hours before
You want to be fed, not full. Hangry expressions photograph badly. Skip heavy meals immediately before — bloating shows in studio lighting.
Normal hydration
A glass of water on the way to the studio is enough. Don't over-hydrate (puffy face) or under-hydrate (dry skin).
Skip the gym the morning of
Post-workout flush takes 1-3 hours to settle. Schedule workouts for the day before or skip the morning of.
Allow 30 minutes for makeup if applicable
Studio lighting is unforgiving — heavy makeup looks heavier, no makeup looks tired. The middle ground is everyday office makeup, slightly enhanced. If your studio includes professional hair and makeup (some boudoir and high-end packages do; standard headshot sessions usually don't), arrive at the time they instruct.
Wear comfortable clothes to the studio
Change into wardrobe at the studio. Driving in your headshot wardrobe risks wrinkles, sweat marks, or seatbelt creases.
Bring backup options
- Lint roller (catches surprise lint pickup)
- Touch-up makeup
- Hair brush
- Phone (for last-minute reference photos if needed)
- Water bottle
- Confidence in arriving 10 minutes early
Don't drink coffee immediately before
Caffeine can cause subtle facial flush and slight tremor visible in tighter framing. If you need coffee, have it 1-2 hours before, not on the way to the studio.
At the Studio
Arrive 5-10 minutes early
Rushed energy reads in the first 5-10 frames. The buffer time settles you. Arriving on the dot or late means the first wardrobe is captured while you're still settling.
Brief check-in with the photographer
Confirm wardrobe order, discuss any specific use case requirements, and identify anything you want to flag (a side of your face you prefer, a specific feature you want emphasized or de-emphasized, a specific use context that matters for one of the looks). If your session is for a company team page or directory listing, let the photographer know — corporate headshot sessions follow a tighter consistency standard that affects lighting and backdrop decisions.
Trust the direction
The photographer is checking what's working in real time. You don't need to monitor your own posing or expression — that's the photographer's job. Respond to the cues, breathe normally, and let the session run.
Don't apologize
A common pattern in professional sessions: subjects apologize repeatedly for "looking weird," "feeling awkward," or "not knowing how to do this." This is universal — first-time clients especially. The photographer expects it. Settling in is part of the session, not a problem to fix.
Drink water between wardrobe changes
Studio lighting is dehydrating. Sip water during transitions — not so much that you need to break for the bathroom mid-session.
After the Session
Wait for the gallery before judging
The frames you see on the back of the camera at the studio aren't the final images. They're un-retouched, lit by ambient room light during preview, and look very different from the delivered files. Wait for the proper gallery delivery (usually 3-5 business days) before evaluating.
Look at the gallery on a real screen
Phone-screen evaluation distorts images. Look at the gallery on a laptop or monitor for accurate evaluation.
Pick favorites in batches
Don't try to pick all 10 favorites in one sitting. Sort by category (look one, look two, etc.), shortlist 2-3 from each batch, then pick finals across the shortlist.
Use the photo immediately
The photo is at its strongest reflection of you on the day you receive it. Update LinkedIn within a week. Update other professional contexts as time allows. Photos that sit unused for months sometimes feel "older" by the time you use them.
Things You Don't Need to Worry About
A non-exhaustive list of things first-time clients worry about that don't matter:
- A pimple appearing the morning of — routine retouching addresses this
- A bad hair day — the photographer can adjust framing and the gallery captures multiple frames
- Not knowing how to pose — the photographer directs you
- Looking "older" than you want to — professional retouching is conservative; you'll look like yourself, just well-photographed
- Not having "model material" features — every face photographs well with the right direction; this is the photographer's job
- Expression anxiety — reactions to direction produce real expressions
The session is built to handle these. Your job is to show up prepared and respond to direction.
Specific Anxieties Worth Addressing
A few real concerns that have practical solutions:
"I don't photograph well"
Almost universally not true. People who don't photograph well in casual snapshots usually photograph well under controlled lighting with proper direction. Casual snapshot conditions are unflattering by design — mixed lighting, wide-angle phone lens, no posing direction. Studio conditions are the opposite of all three.
"My weight is up/down right now"
Posing and framing handle small body composition variations. Professional posing emphasizes flattering angles regardless of starting condition.
"I'm not photogenic"
Same answer as "I don't photograph well." Photogenic is largely a function of conditions and direction, not innate facial structure.
"I look much better in person"
True for almost everyone in casual snapshots. The professional session is designed to capture you closer to how you look in person — controlled lighting, flattering compression, deliberate direction.
Ready to Book?
Get in touch to schedule. Photography Shark is in Rockland, MA — 35 minutes south of Boston. Sessions start at $395 with 10 fully retouched images and full commercial use included.
Free download: free 15-page headshot prep guide — what to wear, posing, the squinch and LinkedIn sizes in one PDF.
Related reading: What is a headshot? · Headshot wardrobe guide · Professional headshot poses · Professional headshot examples · AI headshots vs real photography
Frequently Asked Questions
How do I prepare for a professional headshot session?
The week before: get a haircut 7-10 days out (not the day before), assemble 2-3 wardrobe options, schedule a trim of facial hair if applicable. The day before: iron everything, lay out wardrobe, get a normal night of sleep. The morning of: light meal, normal hydration, arrive 10 minutes early. The photographer handles everything during the session itself.
When should I get a haircut before headshots?
7-10 days before the session. Hair settles into its natural shape after about a week, so a haircut taken on the day or day-before photographs as "freshly cut" rather than "well-groomed." If you can't time it 7-10 days out, a haircut 3-4 weeks before the session is preferable to the day before.
Should I wear makeup for a professional headshot?
For most professional headshots, light to moderate makeup photographs better than no makeup or heavy makeup. Studio lighting is bright and unforgiving — bare skin can look uneven, while heavy makeup can read as caked. The standard recommendation is your everyday office makeup, slightly enhanced. Some studios include professional makeup; ask before booking.
What time of day should I schedule my headshot?
Studio sessions can be scheduled any time the studio is open because lighting is controlled. Personal preference: morning sessions (10 AM - 12 PM) often produce more energetic frames because subjects haven't worked through a full day yet. Late afternoon (3-5 PM) works equally well if you're a night owl. Avoid scheduling immediately after a stressful meeting or workout.
What if I get a pimple right before my headshot?
Don't reschedule. Skin imperfections are routinely retouched in post-production and do not affect the final image. Same for any transient skin issues — minor cuts, bug bites, dry patches. Scheduling around skin perfection is unnecessary and impossible.
Related Posts
You Might Also Like
About the Author
Chris McCarthy
Chris McCarthy has run Photography Shark Studios in Rockland, MA for over 10 years and 500+ sessions, with executive headshot work for Rockland Trust, Clean Harbors, M&T Bank, and McCarthy Planning; founder portraits for AI startups including Lowtouch.ai; product photography for South Shore brands like Lauren's Swim; and headshots across South Shore legal, medical, financial, and academic practices. Every session is personally shot and edited by Chris on Sony mirrorless and Godox strobe systems — no assistants, no outsourcing, no batch retouching. Galleries deliver in 3–5 business days. About Photography Shark →
Photography Shark · Boston & South Shore MA
Ready to Book a Session?
Professional headshots, senior portraits, boudoir, and model portfolios. Studio in Rockland, MA — 25 miles south of Boston. Sessions from $395.